
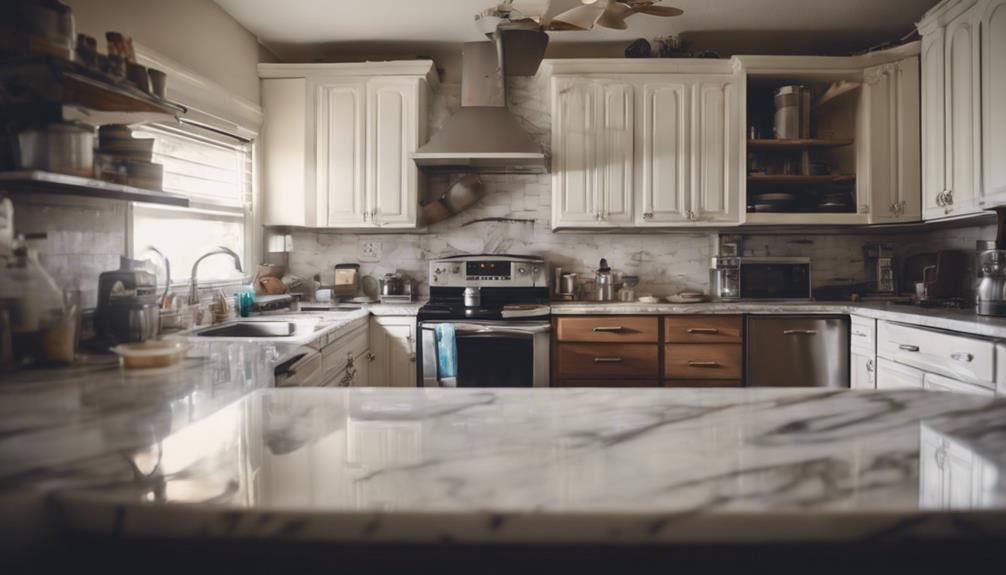
Get ready to be amazed by witnessing an uninspiring kitchen undergo an incredible overnight transformation, going from dull to absolutely stunning right before your eyes. Every detail, from careful planning to precise execution, was taken into consideration to achieve this remarkable change in a short amount of time. The previously uninteresting space was completely renovated into a captivating sanctuary that will leave you mesmerized. Don’t miss the chance to uncover the secrets behind this extraordinary renovation that exceeded all expectations. Find out how affordable home decor ideas were utilized to breathe new life into the kitchen without breaking the bank. Each element was selected with style and budget in mind, demonstrating that a stunning makeover does not have to be expensive. Join us as we reveal budget-friendly tips and tricks that helped turn this lackluster kitchen into a stunning masterpiece. Explore how simple changes, like a fresh coat of paint, strategically placed accent pieces, and smart organization solutions, can make a huge difference in any area. These home decor budget tips will enable you to transform your own space without spending too much or compromising on style. Stay tuned as we explore the creative strategies that made this stunning makeover possible, proving that a limited budget can’t stand in the way of a determined vision and a little creativity.
Key Takeaways
- Navy blue cabinets with faux brick backsplash create a stunning focal point.
- Open shelving replaces upper cabinets for a modern, airy feel.
- Custom island and unique cabinet configurations add functionality and style.
- Meticulous paint application and decor selection elevate the space dramatically.
- Homeowner collaboration and meticulous planning ensure a breathtaking overnight transformation.

Nuvo Titanium Infusion Cabinet Makeover Kit – Easy DIY 7-Piece Set, Brilliant White, Long-Lasting Finish
Ultra-White Brilliance: Experience the transformative power of Titanium Infusion, an ultra-white hue inspired by the artist’s palette –…
As an affiliate, we earn on qualifying purchases.
As an affiliate, we earn on qualifying purchases.
Demo Day Preparation
Before diving into the exciting demo day, meticulous planning and preparation were key to guarantee a successful home transformation for William and Andrea. Detailed discussions with the homeowners allowed for a thorough understanding of their vision, ensuring that every aspect of the renovation project was carefully considered.
From selecting paint colors to choosing countertops, every decision was made with precision. Materials were promptly purchased, and tools were meticulously prepared, ready to bring the renovation plans to life. William, dedicated to his HR job, and Andrea, a passionate school teacher, generously welcomed the transformation of their home.
The renovation blueprint included reconfiguring cabinets, adding a stylish island, and painting cabinets in a sophisticated dark blue-gray hue. Additionally, the installation of white quartz countertops and a charming brick backsplash was on the agenda.
With everything meticulously planned and prepared, the stage was set for an incredible home metamorphosis that would leave William and Andrea in awe.

GIOTORENT 5-Wire Standing Book Shelf & Bookcase, Metal Storage Shelving Unit Pantry Rack for Laundry Kitchen Bathroom Organizer, Black
CUSTOMER SUPPORT: We will provide the best solution within 24 hours. There are many parts in the shelf…
As an affiliate, we earn on qualifying purchases.
As an affiliate, we earn on qualifying purchases.
Cabinet and Backsplash Removal
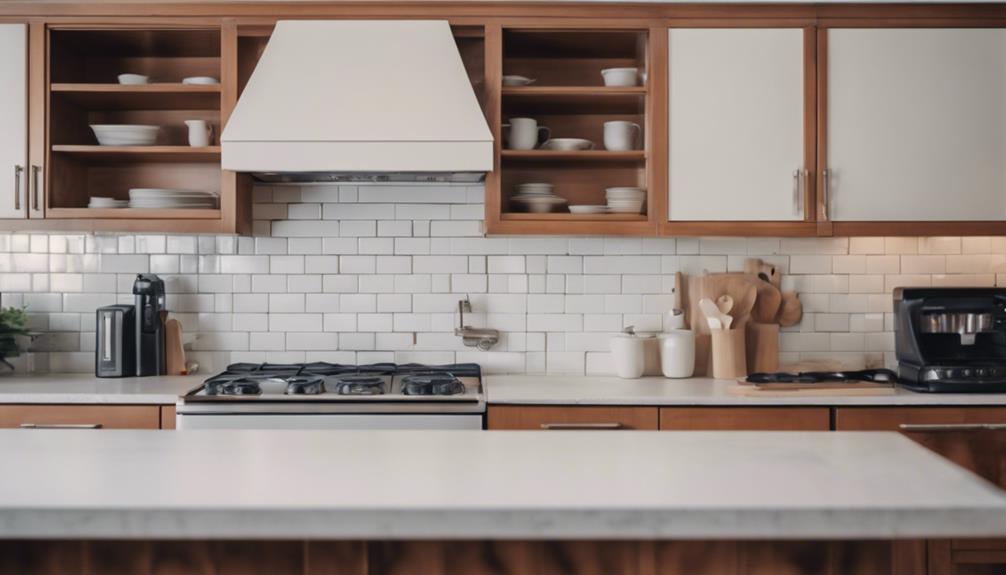
Preparations complete, the next step in the stunning home makeover involved carefully removing the upper cabinets and backsplash to make way for the upcoming renovations.
The upper cabinets were taken down to introduce open shelves, enhancing both functionality and aesthetics in the kitchen. Special attention was given to the pantry cabinet due to its delicate condition, ensuring a seamless shift for the forthcoming upgrades.
Systematic removal of the backsplash, countertops, sink, and other elements was carried out to prepare for the installation of new materials. Prior to this, outlets were disconnected to guarantee safety and proper handling of electrical components during the removal process.
Necessary supplies were efficiently sourced from local building supply stores and Home Depot, streamlining the removal procedures and laying the groundwork for the remarkable transformation ahead.

Commomy 10 Pcs 3D Faux Brick Wall Panels -11.8"X11.8" Small Size PVC Brick Peel and Stick Tiles Backsplash DIY Brick Wallpaper Wall Tile for Bedroom, Living Room, Kitchen, Fireplace, RV
[Realistic 3D Brick Textures, Small Size Each Brick] Commomy 3D faux brick wall panels create a farmhouse style…
As an affiliate, we earn on qualifying purchases.
As an affiliate, we earn on qualifying purchases.
Custom Cabinet and Island Building
The kitchen renovation project progressed by skillfully installing a custom cabinet for the sink area and constructing a unique island to optimize the layout.
Here's how the transformation unfolded:
- Sturdy Construction: Plywood was strategically chosen for the island's side panels, ensuring a robust and long-lasting structure.
- Secure Attachment: Creative problem-solving techniques were employed to securely attach cabinets by using wood screws, guaranteeing stability and durability.
- Stability Enhancement: The base for cabinets on the island's backside was meticulously constructed and anchored to concrete, providing a solid foundation for the island.
- Customized Design: Skillfully crafted posts and panels, along with a vent hood installation using leftover plywood, added a personalized and distinctive touch to the overall kitchen design.

Giani Easy Epoxy Quartz Countertop Paint Kit (White Glass)
Luxurious Aesthetic: Emulates the high-end look of white quartz with a glassy sheen, ideal for adding a touch…
As an affiliate, we earn on qualifying purchases.
As an affiliate, we earn on qualifying purchases.
Painting Process

You'll discover the thoughtful consideration that went into selecting the navy blue 'Chimney' paint color for the cabinets.
The use of Behr Alkyd Enamel paint guaranteed a smooth and durable finish, achieved through meticulous priming and painting techniques.
Additionally, the installation of the backsplash panel played a vital role in the overall stunning transformation of the kitchen.
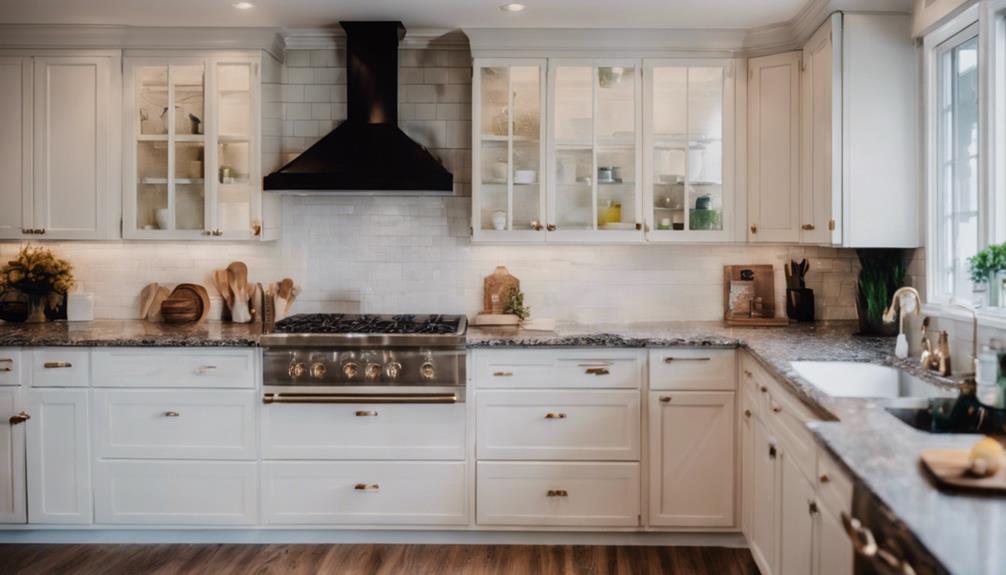
Cabinet Color Selection
Selecting the navy blue paint color 'Chimney' for the cabinets was a bold and modern choice that transformed the kitchen's overall aesthetic. The deep blue shade added a sense of sophistication and drama to the space, creating a striking contrast against the white quartz countertops and brick backsplash.
The Behr Alkyd Enamel paint chosen for the cabinets guaranteed a durable and smooth finish. To achieve this impressive look, the cabinets were first primed with Bin shellac primer, then expertly painted using both an HVLP sprayer and an airless paint sprayer. This thorough process not only enhanced the visual appeal of the kitchen but also elevated the cabinets to become a focal point in the room's design.
The navy blue cabinets now stand out as a statement piece, showcasing the homeowner's bold yet refined style.
Painting Techniques Used
Exploring different painting techniques was necessary in achieving the desired transformative effect on the cabinets. The navy blue paint color 'Chimney' was meticulously applied using Behr Alkyd Enamel paint. This choice not only created a bold and modern look but also secured durability and a professional finish.
To prepare the cabinets for painting, they were first primed with Bin shellac primer, ensuring proper adhesion and a flawless end result.
The application of paint was carried out with precision using both HVLP and airless paint sprayers. This method allowed for efficient and even coverage, highlighting the intricate details of the cabinet design.
The careful attention to detail throughout the painting process played an essential role in the stunning transformation from a lackluster appearance to a breathtaking one overnight. The result was a kitchen that exuded elegance and sophistication, all achieved through the skilled use of painting techniques.
Backsplash Panel Installation
To complement the stunning cabinet transformation, the next step involved installing faux brick panels for the backsplash, enhancing the kitchen's overall aesthetic with an eclectic coffee shop vibe.
- Precise Cuts:
Half bricks were meticulously cut between panels to ensure accurate measurements around outlets and switches.
- Secure Attachment:
The panels were affixed to the wall using Liquid Nails and a brad nailer, ensuring a secure fit that would withstand daily use.
- Seamless Finish:
Seams were expertly concealed with drywall compound, providing a flawless look that enhanced the aged brick appearance.
- Extended Design:
Extending the backsplash to the ceiling not only added a cohesive element to the kitchen but also contributed to a visually appealing design that tied the entire space together seamlessly.
With these meticulous installation techniques, the backsplash panel not only transformed the kitchen but also added a touch of charm and character that elevated the entire space to new heights of elegance and style.
Backsplash Installation

During the backsplash installation, faux brick panels were meticulously placed to evoke an eclectic coffee shop ambiance in your kitchen. The process involved precise cutting to fit half bricks between panels and measuring outlet and switch locations for accuracy.
By firmly attaching the panels to the wall with Liquid Nails and a brad nailer, a durable finish was guaranteed. Skilled application of drywall compound concealed seams, achieving an aged brick appearance for a unique design element.
Extending the backsplash to the ceiling added a cohesive look, enhancing the overall transformation of your kitchen overnight. This attention to detail not only provided a visually striking focal point but also brought a touch of charm and character to the space.
The combination of the faux brick panels and expert installation techniques resulted in a stunning backsplash that truly elevated the aesthetic of your kitchen.
Finishing Touches
Adding the final touches to your home makeover involves installing toe kicks and quarter rounds for a polished finish. The toe kicks provide a seamless shift from the bottom of your cabinets to the floor, giving your kitchen a cohesive and refined appearance.
Meanwhile, quarter rounds are essential for covering the gaps between the flooring and baseboards, ensuring a clean and professional look throughout the room.
To elevate the overall aesthetic, carefully selected decor items are strategically placed to enhance the newly renovated kitchen. These additions bring personality and style to the space, tying together the design elements for a coherent look. Additionally, appliances sourced from Lowe's are integrated to complement the updated kitchen design seamlessly.
As part of the final touches, touch-up paint is meticulously applied after caulking edges to guarantee a flawless finish in the kitchen. Finally, the installation of flooring completes the stunning home makeover, adding both beauty and functionality to your space.
Decor Shopping
For an elevated home transformation, your next step is to focus on selecting the perfect decor items to add character and personality to your newly renovated kitchen.
Decor shopping involves choosing finishing touches like toe kicks, quarter rounds, and decor items to complete the kitchen transformation.
Justine, with her expertise, assisted in selecting and staging decor items to enhance the overall look and feel of the renovated kitchen.
Appliances from Lowe's were carefully chosen to seamlessly complement the new kitchen design.
The final kitchen day included the installation of these finishing decor items, ensuring that the space exuded charm and personality.
Progress was already underway in purchasing these finishing decor items, guaranteeing that the kitchen would be ready for the big reveal to friends.
With each carefully selected piece, the kitchen was one step closer to becoming a truly breathtaking space that reflected your unique style and taste.
Final Kitchen Day
You're now at the stage where you'll be installing the finishing touches in your kitchen. Adding toe kicks, quarter rounds, and touch-up paint will bring the space together seamlessly.
As you finalize the flooring and stage decor items, the stunning transformation of your kitchen will soon be ready to reveal to your friends.
Finishing Touches Installation
During the final kitchen day, focus on installing toe kicks and quarter rounds to complete the cabinet bases for a polished look. Touch-up paint is applied after caulking the edges for a seamless finish.
As the renovation nears completion, it's time to add the finishing touches that will truly make your kitchen shine. Here are the key steps to finalize the transformation:
- Toe Kicks and Quarter Rounds: Confirm that the cabinet bases are perfectly finished with the installation of toe kicks and quarter rounds, giving your kitchen a professional and cohesive appearance.
- Caulking and Touch-Up Paint: Seal any gaps with caulking and apply touch-up paint to create a flawless finish, enhancing the overall aesthetic of the space.
- Decor Items Staging: Curate and strategically place decor items to add personality and style to your newly renovated kitchen, making it feel warm and inviting.
- Appliance Integration: Integrate the appliances purchased from Lowe's seamlessly into the design, ensuring they blend harmoniously with the rest of the kitchen elements.
Decor Items Staging
Verify the selection and strategic placement of decor items, such as plants, vases, and artwork, to enhance the final aesthetic of your kitchen during the staging process. Justine's sharp eye for design ensures that these decor elements are integrated seamlessly into the space. The appliances sourced from Lowe's are cleverly incorporated into the overall decor scheme, creating a cohesive and polished look.
The decor items play a pivotal role in accentuating the dark blue-gray cabinets, white quartz countertops, and brick backsplash, enhancing the color palette and textures of the kitchen. By carefully curating these elements, the space is elevated from mundane to magnificent.
With the finishing touches of staging decor items, the kitchen undergoes a remarkable transformation, turning it from a dull space into a breathtaking culinary haven. The thoughtful selection and placement of these pieces add depth, personality, and charm to the newly renovated kitchen.
Homeowner Background

In their daily lives, William works in HR at a local hospital, while Andrea dedicates her time to teaching at a school.
The homeowners, William and Andrea, graciously allowed their home to undergo extensive renovations. Here are some key points about the homeowners:
- Occupations:
- William: Works in HR at a local hospital.
- Andrea: School teacher.
- Involvement in Renovation:
- Actively participated in detailed discussions with the renovation team.
- Collaborated closely to plan every aspect of the renovation.
- Renovation Plans:
- Included reconfiguring cabinets.
- Added an island to the kitchen.
- Opted for painting cabinets in a stylish dark blue-gray color.
- Outcome:
- The homeowners' teamwork with the renovation crew led to a breathtaking transformation of their previously mundane home into a stunning haven.
Frequently Asked Questions
How Do I Nominate Someone for a Home Makeover?
To nominate someone for a home makeover, gather their compelling story, photos, and videos. Follow the specific criteria of the show or company, and submit a detailed nomination. Be patient during the selection process and potential interviews.
How to Makeover a Home?
To makeover a home, start by planning, selecting materials, and communicating preferences clearly. Removing old elements, installing custom features, and adding finishing touches are key. Collaborate with a team, source materials locally, and enjoy the process!
How Did Adele’s Performance Transform the Houston Night?
Adele’s electrifying performance in Houston brought the crowd to their feet, creating a transformative night of music. Her powerful vocals and emotional delivery left a lasting impact on everyone in attendance. The energy and passion she brought to the stage truly made it a night to remember for all.
Conclusion
To sum up, remember that Rome wasn't built in a day, but your dream kitchen can be!
With the right team and a little creativity, your home transformation can go from boring to breathtaking in no time. By selecting the right team of designers and contractors, you can bring fresh ideas and expertise to the table. Additionally, incorporating home decor budget tips can help you achieve your dream home without breaking the bank. With a little research and planning, you can find affordable ways to enhance your space and make it truly stunning.
So don't be afraid to take on that renovation project and make your space uniquely yours.
After all, as they say, fortune favors the bold!