Your projector’s throw distance is actually simpler than it seems. Just check the throw ratio in the specs, like 1.5:1, which tells you how far back to place the projector for your desired image size. Use lens adjustments such as zoom and focus to fine-tune the picture. Proper placement, alignment, and calibration will make setup easier and guarantee a crisp, well-sized image. Keep going to find out more tips for the perfect setup.
Key Takeaways
- The throw ratio guides you to the correct projector distance based on desired image size.
- Adjust lens zoom and focus for precise image sizing without moving the projector.
- Use lens shift to align the image perfectly without repositioning the projector physically.
- Proper calibration ensures a clear, proportioned image, simplifying setup.
- Understanding these features makes achieving the ideal throw distance straightforward and stress-free.
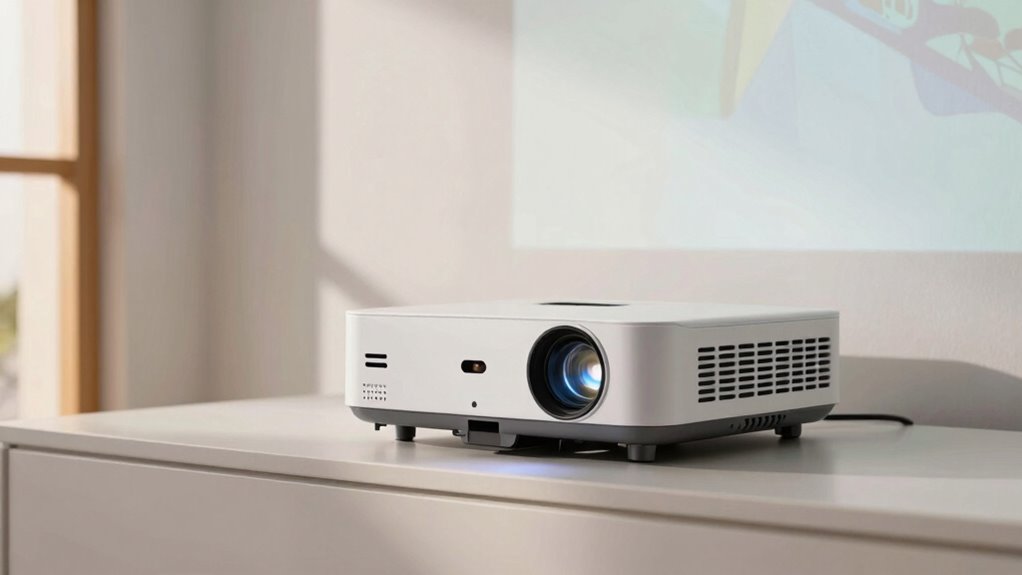
Have you ever wondered how close or far a projector needs to be from a screen to produce a clear, sizable image? The answer hinges on understanding projector throw distance, which might seem complicated at first but is actually straightforward once you get the hang of a few key concepts. It’s primarily about the relationship between your projector’s placement and the size of the image you want. Most projectors come with a specified throw ratio, which helps you determine the optimal distance based on your desired image size. For example, a projector with a 1.5:1 ratio means that for every foot of image width, you should position the projector 1.5 feet away. Knowing your projector throw ratio can make setup much easier and more precise.
Getting that perfect image involves more than just distance, though. You’ll want to perform proper image calibration to ensure the picture isn’t distorted or blurry. This process involves adjusting the projector’s settings and lens to align the image correctly with your screen. Lens adjustment is key here; many projectors have zoom and focus features that let you fine-tune the image size and sharpness without moving the device. By tweaking these, you can make the image larger or smaller and sharpen the picture for clarity. It’s a simple step that makes a big difference in achieving a crisp, well-sized projection. Additionally, understanding projection placement principles can help you avoid common setup mistakes and optimize your viewing environment.
Proper image calibration with lens adjustments ensures a sharp, correctly sized, and distortion-free projection.
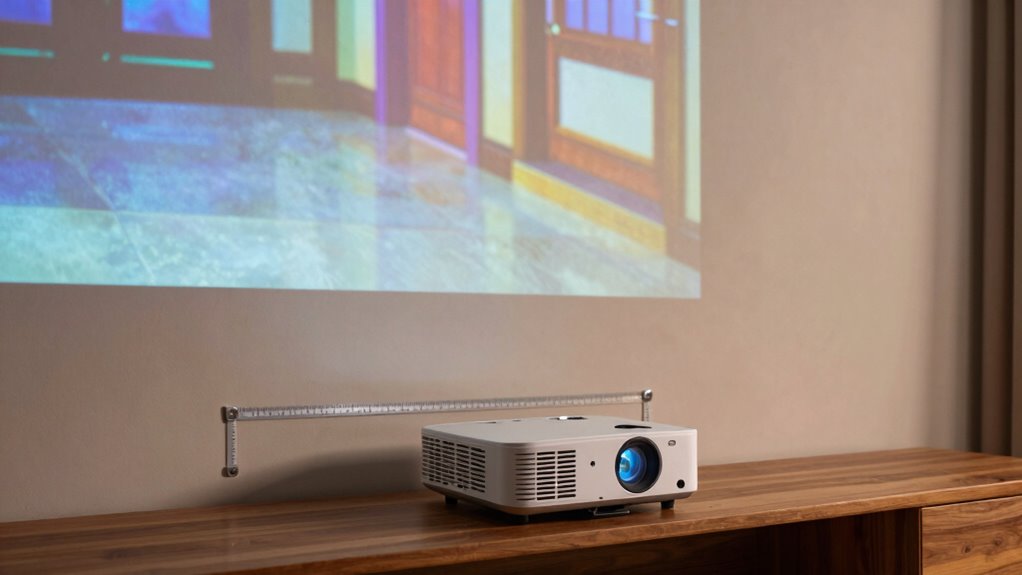
Once you’ve set the lens adjustments, it’s time to verify the throw distance. Use the projector’s lens shift feature if it has one—this allows you to move the image horizontally or vertically without physically repositioning the projector. This flexibility can help you get the image perfectly aligned with your screen, especially in tight spaces. Remember, the goal is to minimize keystone distortion and ensure the image is square and proportionate. Proper placement combined with lens adjustment guarantees a better viewing experience. Additionally, understanding projector placement principles can help you avoid common setup mistakes and optimize your viewing environment. Taking precise measurements can also help you ensure your setup adheres to the recommended throw ratio for your specific model. When all is aligned correctly, your image will be clear, sizable, and correctly proportioned, making your viewing experience much more enjoyable. So, while it might seem intimidating at first, understanding projector throw distance isn’t complicated. With a little attention to image calibration and simple lens adjustments, you’ll get the perfect picture every time.
projector throw distance calculator
As an affiliate, we earn on qualifying purchases.
As an affiliate, we earn on qualifying purchases.
Frequently Asked Questions
How Do Ambient Light Conditions Affect Throw Distance?
Ambient light impacts your projector’s throw distance because higher ambient light makes it harder to see the image clearly. To compensate, you might need a projector with higher brightness, which can allow you to keep the same throw distance without sacrificing image quality. Fundamentally, in brighter rooms, you may need to move the projector closer or choose a brighter model to guarantee your image remains sharp and visible.
Can I Use a Short-Throw Projector in a Large Room?
Yes, you can use a short-throw projector in a large room. Projection technology in short-throw models allows you to place the projector close to the screen, saving space. Just make certain your mounting options are flexible enough to position it correctly, considering the room’s size. Proper setup ensures clear images without shadows, even in large spaces. Adjust throw distance settings to optimize image size and clarity for your specific environment.
Do Different Projector Brands Have Different Throw Distance Calculations?
Imagine you’re choosing between two brands for your home theater. Brand differences mean their throw distance calculations can vary considerably, even for similar models. Calculation variations happen because each manufacturer uses different lens designs and technology. So, you can’t assume all projectors have the same throw distance. Always check the specific projector’s specifications and calculation formulas to guarantee it fits your space and viewing needs.
How Does Screen Size Impact Throw Distance Requirements?
Screen size directly impacts throw distance requirements because larger screens need more space for proper projection. When you’re doing screen calibration or projector mounting, make certain the projector is placed at the right distance to fill the screen without distortion. As you select your projector, check its throw ratio, and adjust the mounting position accordingly. This way, your image stays sharp, and your setup remains seamless and effective.
What Are the Best Placement Tips for Optimal Throw Distance?
Did you know that the ideal projection angle is between 30° and 45° for clear images? To optimize throw distance, align your projector properly and consider mounting height—placing it too high or low can distort the image. Aim for a level setup that minimizes keystoning. Adjust projection angles as needed to avoid shadows or distortion, ensuring your image stays sharp and correctly sized for your space.

Fixed Iris Lens, Auto Focus Motorized Zoom Lens 6-22mm Focal Length for Camera
Tough Shell: The lens is protected by premium aluminum alloy shell, which can be used in extreme environments,…
As an affiliate, we earn on qualifying purchases.
As an affiliate, we earn on qualifying purchases.
Conclusion
Understanding projector throw distance is like discovering a secret code—once you grasp the basics, everything falls into place. With a few simple measurements and some quick calculations, you’ll find the perfect spot for your projector without breaking a sweat. Think of it as tuning a fine instrument; once in harmony, your viewing experience will be seamless and breathtaking. So, don’t let distance intimidate you—embrace it, and enjoy your cinematic journey.

JMGO N3 Ultimate 4K Triple Laser Projector, 5800 ISO Lumens, 3-in-1 Lens Shift, Optical Zoom, AI Gimbal, 20000:1 Contrast, 1ms Low Latency, VRR & ALLM, Dolby Vision Home Theater.
3-in-1, True Lossless, True Freedom: Get a perfect picture from anywhere. This 4K projector features an upgraded Four-way…
As an affiliate, we earn on qualifying purchases.
As an affiliate, we earn on qualifying purchases.

DSLRKIT Lens Focus Calibration Tool Alignment Ruler Folding Card(Pack of 2)
This compact ruler allows you to determine if your lens is auto-focusing accurately as it should. It is…
As an affiliate, we earn on qualifying purchases.
As an affiliate, we earn on qualifying purchases.