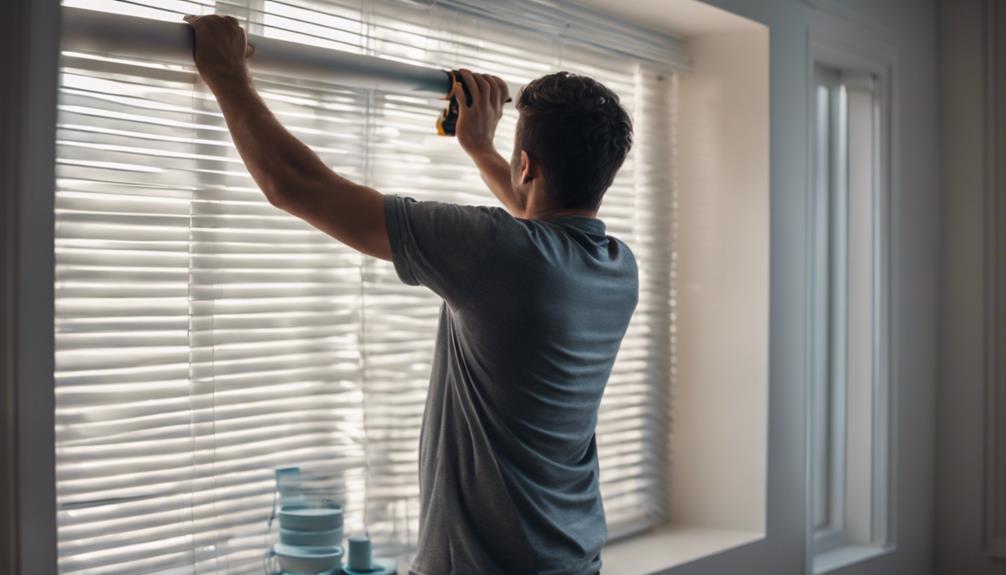

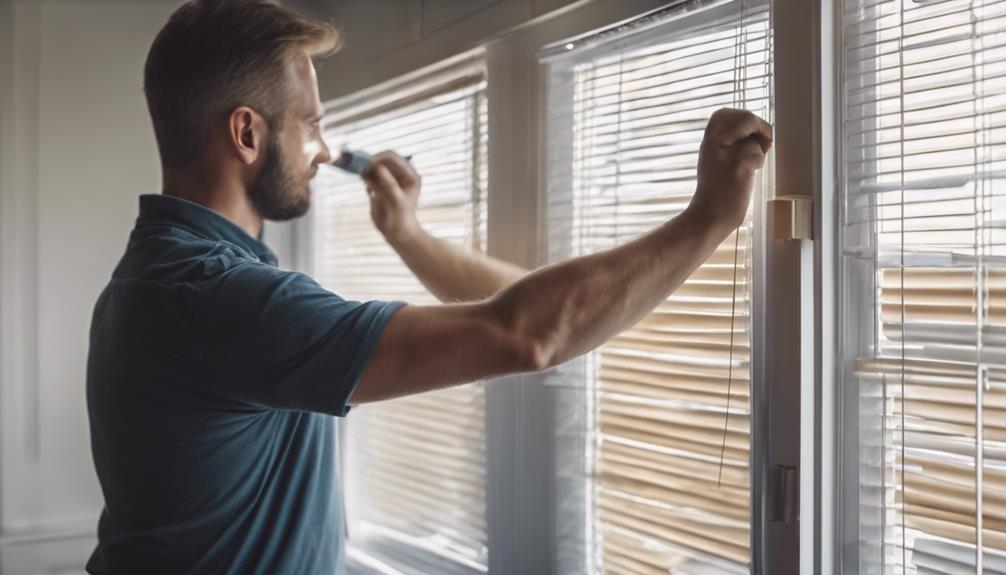
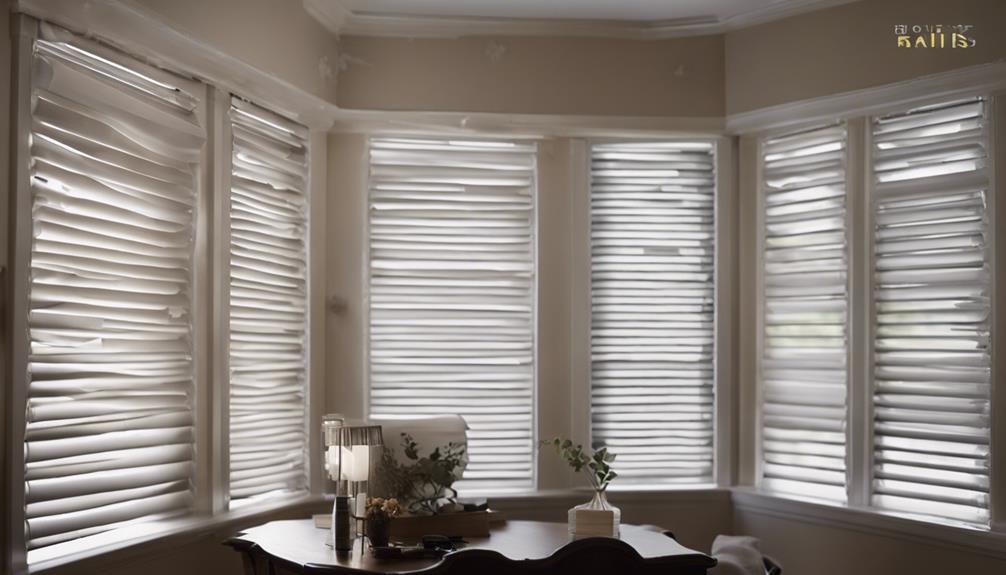
To set up home decor blinds in minutes, accurately measure your window frame for the perfect fit. Use at least three brackets and a power screwdriver for simple installation. Attach the blinds by sliding the tab into the top groove and snapping the back part in place. Ensure smooth operation by adjusting the louvers with the stick. Verify stability and functionality by gently shaking the blinds. Then, fine-tune the louvers for optimal light control and bask in the perfect ambiance. For additional tips on securing brackets correctly and ensuring smooth operation, continue exploring the provided steps.
Key Takeaways
- Measure window frame accurately for precise fit.
- Use power screwdriver for efficient installation.
- Ensure proper bracket placement for stability.
- Attach louver stick for smooth operation.
- Test blinds for functionality and adjust louvers.

EVEO Screen Cleaner Spray - Large Screen Cleaner Bottle - TV Screen Cleaner, Computer Screen Cleaner, for Laptop, Phone, Ipad - Computer Cleaning kit Electronic Cleaner (1 Pack)
- Versatile Screen Cleaning: Suitable for TVs, laptops, phones, and tablets
- Effective Streak-Free Cleaning: Removes dust, fingerprints, and smudges
- Gentle on Sensitive Screens: Safe for LCD, LED, OLED, CRT screens
As an affiliate, we earn on qualifying purchases.
Measuring for Blinds
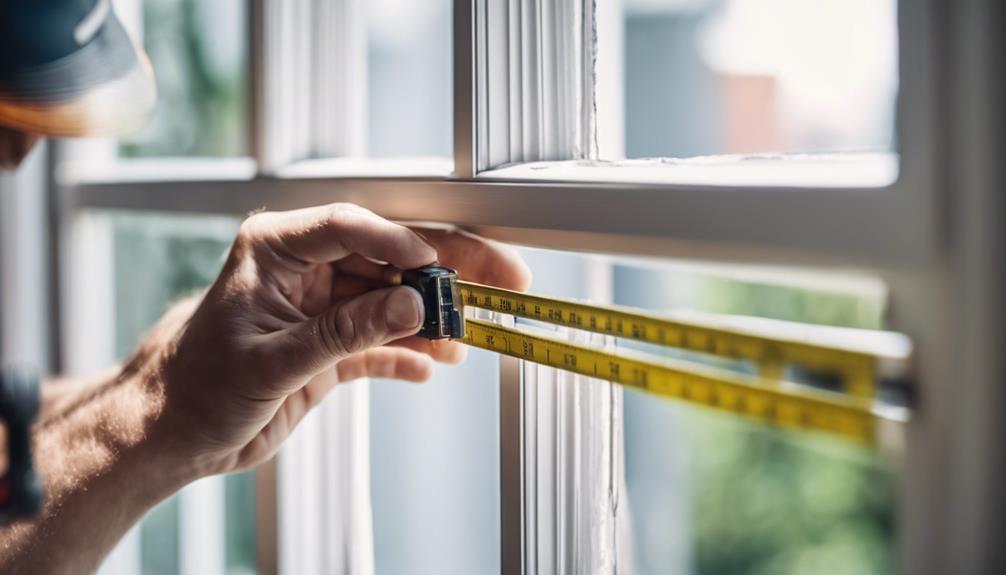
To measure for blinds accurately, start by measuring the width within your window frame at multiple points to account for variations. Next time you're measuring, make sure to inspect the top, middle, and bottom of the window frame to ensure a precise fit. It's crucial to consider these multiple points as windows can sometimes be slightly uneven.
Moving on to the height measurement, make sure you measure from the top of the window frame to the sill or desired length. For outside mounting, remember to add extra length to the width measurement to guarantee proper coverage and light blockage. Additionally, if you're opting for inside mounting, take into consideration the depth of the window frame to avoid any obstructions.
To end, before taking measurements, check for any obstacles like handles or cranks that might interfere with the blind installation. By following these steps, you'll be well on your way to perfectly fitting blinds for your windows.
Bracket Installation

When installing your home decor blinds, it's crucial to evaluate the mounting bracket options available for support.
Make sure to use the suggested screw size for improved stability during bracket installation.
Also, it's vital that all brackets are mounted at the same depth for a level and secure installation.
Mounting Bracket Options
Consider positioning the mounting brackets along the top of your window frame for best flexibility during installation. This allows you to adjust the blinds to your desired height easily. When mounting the brackets, make sure to use larger screws for better support and stability. It's important to keep all brackets at the same depth to ensure the blinds hang level and securely.
| Mounting Bracket Options | |
|---|---|
| Positioning | Top of window frame |
| Screw Size | Larger screws for support |
| Alignment | Keep all brackets at the same depth |
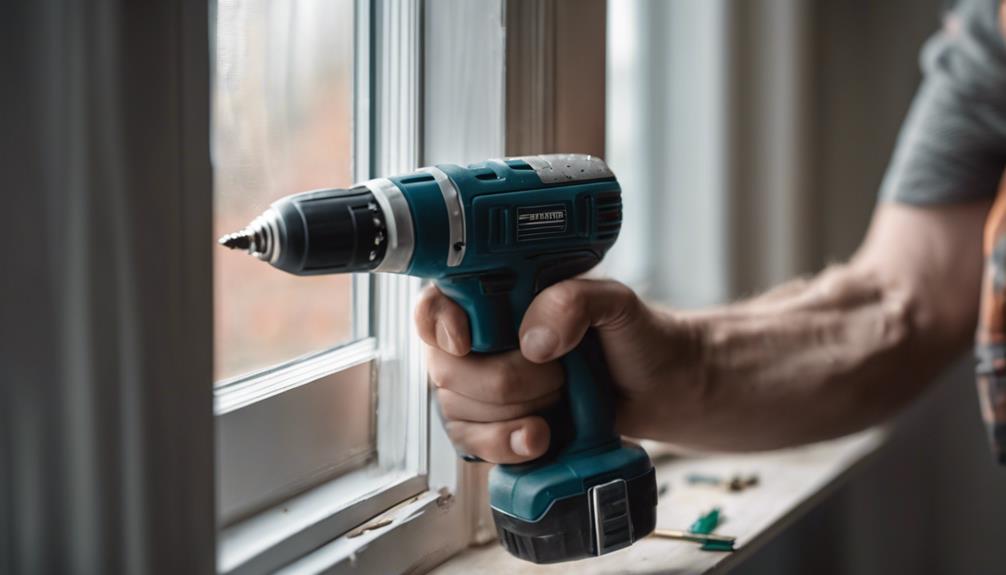
| Tools | Power screwdriver recommended |
| Installation | Bracket nub fits into top groove, clips securely |
Recommended Screw Size
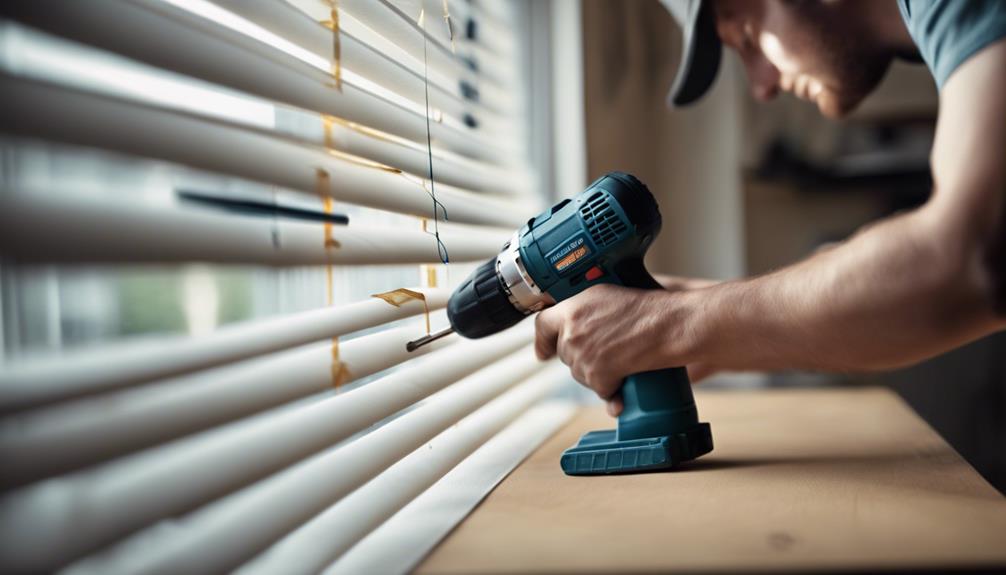
For best support and stability during bracket installation, opting for larger screws like #8 x 1-1/2' screws is suggested. These bigger screws provide a stronger hold, ensuring your blinds stay firmly in place. Using an impact driver with the suggested screws can make the installation process easier and faster.
When installing the brackets, it's essential to confirm all brackets are mounted at the same depth. This uniformity in bracket depth is crucial for maintaining a level and consistent appearance of the blinds once they're hung. To achieve this, mark the hole before screwing in the brackets to guarantee accurate placement and alignment.
Choosing regular sheetrock screws instead of the smaller screws provided can improve the security of the bracket installation. The larger screws offer better stability and decrease the risk of the brackets becoming loose over time.
Consistent Bracket Depth
Maintain consistent bracket depth during installation to uphold a level and uniform appearance for your blinds. Securing that all brackets are mounted at the same depth is essential for a professional finish. This consistency will prevent the blinds from appearing crooked or uneven once they're hung.
Mounting brackets can be placed at various positions along the window's top, offering flexibility in how the blinds are positioned. Opting for larger screws when installing the brackets provides enhanced support and stability to the blinds, reducing the risk of sagging or falling. Using a power screwdriver streamlines the bracket installation process, making it quicker and more efficient.
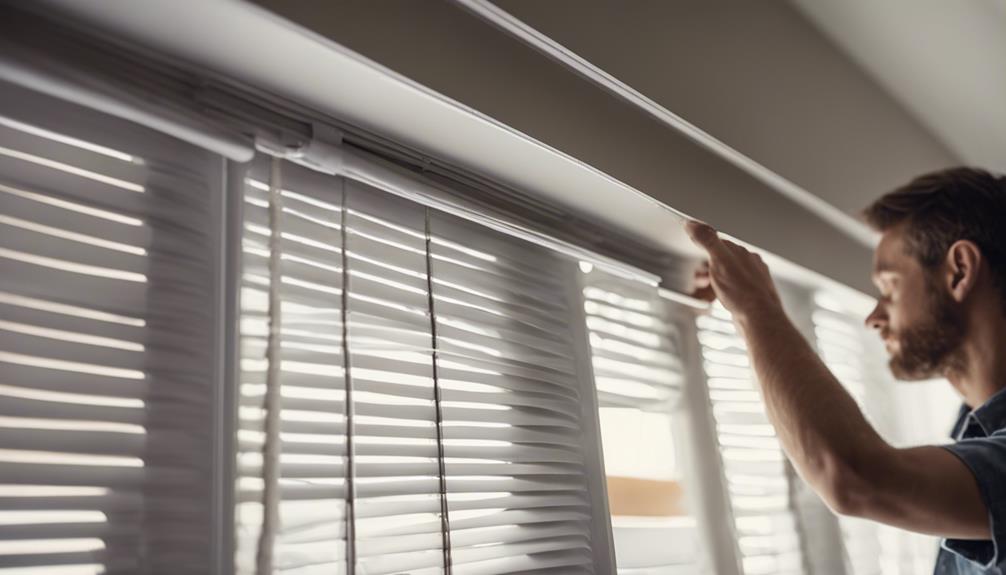
Remember to insert the nub on the brackets inside the top of the window frame before securely clipping them onto the back. This step ensures a robust hold for the blinds, keeping them securely in place.
Blinds Installation
To ensure proper installation, always start by slipping the tab of the blinds into the top groove before snapping the back part in place. This secures that the blinds are firmly attached. Once in place, give them a little wiggle to confirm they're correctly installed.
Next, attach the stick that closes the louvers in the upper left corner of the blinds. This step is crucial for the blinds to operate smoothly and effectively. Adjust the louvers by attaching the stick through the eye hook, ensuring they're open when raising or lowering the blinds.
Lastly, double-check the installation for stability. Confirm the blinds operate smoothly by testing them out before completing the process. Taking these steps will help you enjoy your new blinds with ease and confidence.
Final Steps

Now, focusing on the final steps is crucial to perfecting the operation of your blinds.
Adjust the louvers correctly by attaching the stick through the eye hook for peak functionality.
Remember to test the blinds for any sticking or jamming to ensure a seamless experience.
Adjusting Louvers Correctly
Use the stick to accurately adjust the louvers for ideal light control in your home decor blinds. Attach the stick through the eye hook and move it in the upper left corner to adjust the louvers. Remember to have the louvers open when raising or lowering the blinds to prevent any damage. Guarantee smooth operation by testing the movement of the louvers to ensure they function properly.
Adjusting the louvers correctly is essential for maximizing the functionality of your blinds. By positioning them correctly, you can control the amount of light entering your space and maintain your desired level of privacy. Double-check the installation to confirm the stability of the blinds and position the louvers for peak performance.
Take the time to adjust the louvers to your liking so that you can enjoy the perfect lighting and ambiance in your home. Properly adjusted louvers not only enhance the aesthetic appeal of your space but also improve the functionality of your blinds.
Ensuring Smooth Operation
Attach the stick through the eye hook to guarantee the louvers are smoothly adjusted for optimal light control. This step ensures that you can easily tilt the blinds to let in the perfect amount of light while maintaining your privacy.
Remember, always have the louvers open when raising or lowering the blinds to prevent any potential damage to the mechanism. It's vital to double-check the installation for stability by ensuring all brackets are securely mounted. This will help prevent any accidents and keep your blinds in place for the long run.
To ensure smooth operation, test the opening and closing mechanism several times to confirm that the blinds move effortlessly. By following these steps, you can enjoy the convenience and functionality of your new blinds.
For more handy tips and tricks on home decor installations, consider subscribing to stay updated with the latest insights.
Tool Recommendation
Consider investing in a power screwdriver for your home decor blinds installation to streamline the process and secure efficient results. The power screwdriver will make the installation quicker and easier compared to manual screwdrivers.
Opt for larger screws when mounting brackets to secure better support and stability. Impact drivers can also be used for installing blinds with less effort and faster results.
Before screwing in the brackets, marking the hole will help secure accurate placement and a stable installation. When it comes to screws, regular sheetrock screws are preferred over the smaller ones provided, as they offer a more durable and reliable mounting of the brackets.
Tips for Inside Mounting
Investing in a power screwdriver for your home decor blinds installation can greatly streamline the process and ensure efficient results, especially when it comes to inside mounting.
To secure a smooth and successful installation, consider the following tips:
- Measure Twice, Install Once: Double-check the measurements of your window frame to secure the blinds will fit snugly with about a half inch of space on each side.
- Bracket Placement: Decide whether to position the mounting brackets on the back or top of the window frame, but avoid placing them all the way on the edge for stability.
- Proper Support: Use at least three brackets for inside mounting to provide ample support for the blinds.
- Flush Finish: Inside mounting allows the blinds to sit flush with the window frame, creating a clean and seamless look for your decor.
Mounting Brackets Placement
When it comes to placing the mounting brackets for your blinds, make certain they're positioned along the top of the window frame to allow for flexibility in installation.
You can choose any spot along the frame that suits your window and design preferences.
Using larger screws for the mounting brackets is advisable as it provides better support and stability for your blinds.
Remember to install all brackets at the same depth to avoid any unevenness when hanging the blinds.
To make the installation process quicker and more efficient, consider using a power screwdriver.
The brackets have a nub that should be inserted inside the top of the window frame before clipping onto the back for a secure attachment.
Following these steps will guarantee that your blinds are mounted correctly and securely for a polished look in your home.
Securing Brackets Properly
To properly secure the brackets for your blinds, make sure they're mounted firmly along the top of the window frame for best support.
Here are four essential tips to guarantee your brackets are properly secured:
- Use larger screws: Opt for larger screws when mounting the brackets to prevent them from loosening over time, providing a more durable hold.
- Consistent mounting depth: Assure all brackets are mounted at the same depth to maintain the blinds' level position and stability.
- Consider a power screwdriver: Using a power screwdriver can streamline the installation process, making it easier and more efficient to secure the brackets firmly.
- Utilize the bracket nub: The nub on the bracket fits inside the top of the window frame and clips onto the back, offering a secure attachment method that enhances stability.
Installing Louver Stick
Attach the louver stick firmly in the upper left corner of the blinds to facilitate easy operation. This step is pivotal for effectively adjusting the louvers. By securing the louver stick in place, you guarantee smooth functionality of the blinds. Insert the stick through the eye hook provided to effortlessly control the position of the louvers.
Proper installation of the louver stick is vital for the overall usability of your blinds. It allows you to easily raise or lower the blinds and adjust the angle of the louvers as desired. When attaching the louver stick, make sure it's securely fixed to avoid any issues during operation. Confirming that the stick is correctly positioned enhances the convenience of operating your blinds on a daily basis.
Ensuring Smooth Operation

To guarantee smooth operation of your blinds, remember to adjust the louvers using the provided stick and keep them open when raising or lowering.
Test the raising and lowering mechanism to check for smooth operation and give the blinds a gentle wiggle to confirm they're securely in place.
For additional tips, consider subscribing to helpful videos that offer maintenance advice.
Louver Adjustment Tips
For smooth operation of the louvers, utilize the included rod to adjust them through the eye hook.
Most blind brands require the louvers to be open when raising or lowering the blinds, maximizing proper functionality.
To guarantee that the louvers are securely in place, give them a gentle wiggle after each adjustment.
Attach the rod to the upper left corner for peak louver operation.
Make sure to double-check that the louvers move smoothly and make any necessary adjustments for ideal performance.
Louver Adjustment Tips:
- Use the included rod to adjust the louvers by inserting it through the eye hook.
- Ensure the louvers are open when raising or lowering the blinds for most blind brands.
- Wiggle the louvers slightly after adjustment to ensure they're securely in place.
- Attach the rod to the upper left corner for smooth louver operation.
Checking Stability After Installation
Guarantee that all brackets are securely mounted at the same depth to maintain stability after installing your home decor blinds. This step is important to ensure that your blinds remain securely in place and operate smoothly.
After installation, test the blinds by raising and lowering them to confirm smooth operation. Pay close attention to any signs of wobbling or shifting, as this may indicate an issue with stability.
Additionally, verify that the louvers open and close without any obstructions, ensuring that they function properly. If you notice any issues with stability or operation, make necessary adjustments to the installation for best performance.
Taking the time to check the stability of your blinds after installation will help prevent future problems and ensure that they function as intended.
Smooth Blinds Operation
Check that the blinds are firmly in place by giving them a slight wiggle after installation to guarantee smooth operation.
To secure your blinds operate seamlessly, follow these key steps:
- Attach the Stick: Confirm the stick that closes the louvers is securely attached in the upper left corner for smooth operation.
- Adjust Louvers: Use the stick to adjust the louvers through the eye hook, securing they move effortlessly for proper functionality.
- Open Louvers: Remember to have the louvers open when raising or lowering the blinds, as this is necessary for most brands to operate smoothly.
- Double-Check Stability: After installation, double-check the blinds' stability by giving them another slight wiggle to confirm they're securely in place. This step will help prevent any issues and secure your blinds operate smoothly without any hitches.
Frequently Asked Questions
How Long Does It Take to Install Window Blinds?
It varies based on window size and blind complexity, typically taking 30 minutes to 1 hour per window. Simple blinds like faux wood may only take 15-30 minutes, while motorized or custom-fit blinds could require more time.
How Do You Install Blinds Easily?
To install blinds easily, measure accurately, mount brackets with larger screws, and attach blinds securely. Use a power screwdriver for efficiency. Remember to open louvers when adjusting blinds. Follow these steps for smooth installation and best functionality.
How to Install Home Decorators Faux Wood Blind?
To install Home Decorators faux wood blinds, securely snap them into place by slipping the tab into the top groove. Attach the stick in the upper left corner for operation. Adjust the louvers with the stick through the eye hook for smooth functionality.
How to Install Window Blinds Without Brackets?
To install window blinds without brackets, you can use adhesive hooks for a temporary fix or opt for magnetic brackets for a secure hold. Clean and dry the surface before applying hooks and enjoy easy adjustment with magnetic brackets.
Conclusion
You've successfully installed your blinds in minutes, just like a pro! Now you can sit back, relax, and enjoy the view through your perfectly hung window wonders.
Who knew home decor could be so easy and satisfying? Just remember, if all else fails, there's always the option to hire a professional (but where's the fun in that?).
Happy decorating!