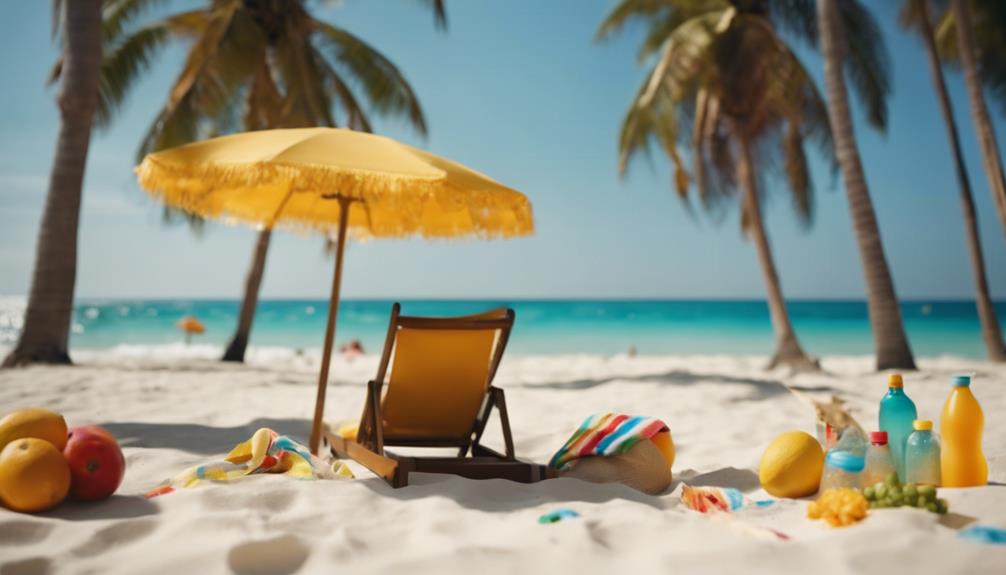
Lifestyle
Perfect Your Tan Before Vacation Bliss
Optimize your tanning routine before vacation bliss with essential tips that will leave you glowing—discover the secrets to a perfect tan!
To perfect your tan before vacation bliss, first, assess your skin type to guarantee you choose the right tanning method. Whether you opt for sun tanning, indoor tanning, or sunless options like lotions and sprays, a gradual approach is key. Plan 5-6 sessions over 4-6 weeks, starting with 3-4 times weekly. Always prioritize safety by applying SPF 30+, limiting exposure, and moisturizing daily. Stay hydrated and avoid harsh scrubs to maintain that radiant glow. There's much more you can do to enhance your tanning experience and secure a stunning look for your vacation.
Key Takeaways
- Assess your skin type to choose the safest tanning method and avoid overexposure before vacation.
- Schedule 5-6 tanning sessions over 4-6 weeks, gradually increasing frequency for optimal results.
- Use SPF 30+ regularly during tanning to protect your skin from harmful UV rays.
- Keep your skin hydrated and moisturized daily to maintain a glowing and even tan.
Understanding Your Skin Type
Understanding your skin type is vital for determining how safely and effectively you can achieve a beautiful tan. You need to assess how your skin reacts to UV rays, whether you tan easily or burn quickly.
Take into account your natural pigment and genetics, as these factors play an important role in your tanning journey. If you're unsure, consulting a dermatologist can provide an accurate skin type assessment tailored to your needs.
Knowing your skin type allows you to choose the right tanning methods and avoid potential damage. This awareness helps you protect your skin while achieving that sun-kissed glow.
Prioritizing this step guarantees a safer, more enjoyable tanning experience that's tailored just for you.
Tanning Methods Overview
When it comes to achieving the perfect tan, you have several options to choose from, each suited to different preferences and skin types.
Here's a quick overview of the most popular tanning methods:
- Sun Tanning: Enjoy the natural sun by soaking up UV rays, but don't forget your SPF for protection.
- Indoor Tanning: Use tanning beds for controlled exposure. This method can speed up the tanning process but requires caution to avoid overexposure.
- Sunless Tanning: Opt for lotions, sprays, or mousses for a UV-free glow. These products allow for quick results without the risks associated with sun exposure.
Choose the method that fits your lifestyle, and always prioritize safety for the best results!
Planning Your Tanning Schedule
How can you effectively plan your tanning schedule to achieve the perfect glow before your vacation?
Start by scheduling 5-6 tanning sessions over 4-6 weeks leading up to your trip.
Aim for 3-4 sessions per week initially, gradually increasing to 6 sessions weekly in the final two weeks for deeper color.
Pay attention to your skin's response; if you notice any redness or irritation, adjust your frequency accordingly.
Consistency is key, so try to stick to your plan, ensuring you get the most out of each session.
Remember to assess your skin type to choose the right method and avoid overexposure.
With careful planning, you'll achieve that radiant tan just in time for vacation!
Safe Tanning Practices
To guarantee a safe tanning experience, prioritize gradual exposure and always apply SPF 30+ before and during your sessions. Here are three key safe tanning practices to follow:
- Know Your Skin Type: Understand how your skin reacts to UV rays. If you burn easily, limit your exposure and opt for shorter sessions.
- Limit Time Under the Sun: Start with 15-30 minute sessions and gradually increase. Avoid peak sun hours (10 AM to 4 PM) to minimize risk.
- Reapply Sunscreen: Use SPF 30+ and reapply every two hours, especially if you're sweating or swimming.
Maintaining Your Tan
Maintaining your tan requires consistent care and attention to keep your skin looking vibrant and healthy after your tanning sessions.
Start by moisturizing daily; this helps prevent flaking and keeps your skin supple. Use a professional tan extender to lock in moisture and choose a mild body wash that won't strip away your tan.
Opt for lukewarm showers instead of hot ones to minimize fading. After tanning, use gentle shower products and avoid harsh scrubs.
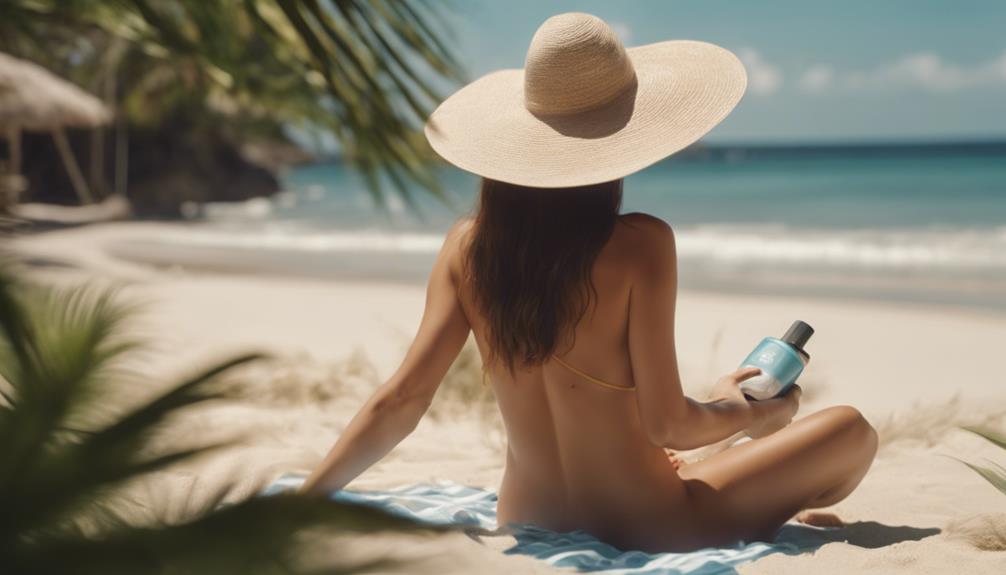
Applying sunscreen with at least SPF 30+ is essential, even if you already have a base tan. This protects your skin while preserving your color.
Tips for Maximizing Your Glow
A few simple steps can greatly enhance your tan and keep your skin looking radiant. Follow these tips to maximize your glow before vacation:
- Exfoliate Regularly: Gently exfoliate your skin twice a week to remove dead cells and create a smooth base for your tan. This helps to achieve an even color and prevents patchiness.
- Stay Hydrated: Drink plenty of water daily to keep your skin hydrated. Well-hydrated skin holds onto your tan better and looks healthier.
- Reapply Sunscreen: Use SPF 30+ and reapply every two hours when outdoors. This not only protects your skin but also prolongs your tan by preventing burns and irritation.
Popular Tanning Discussions
Tanning enthusiasts often engage in lively discussions about the best practices for achieving and maintaining their ideal glow. You'll find topics like tanning frequency, safety measures, and product recommendations at the forefront of these conversations. Here's a snapshot of what's trending:
Topic | Key Points | Community Tips |
---|---|---|
Tanning Frequency | 5-6 sessions recommended pre-vacation | Rotate areas to avoid unevenness |
Safety Measures | Always use SPF 30+ | Hydrate before and after tanning |
Product Recommendations | Best lotions and sprays for sunless tanning | Try a tan extender for longevity |
Tanning Bed Hygiene | Importance of clean equipment | Use personal towels for hygiene |
Post-Tan Maintenance | Moisturize and protect your tan | Avoid hot showers to prolong color |
Engaging in these discussions can help you refine your tanning routine!
Frequently Asked Questions
How Can I Prevent Uneven Tanning Spots on My Skin?
To prevent uneven tanning spots, exfoliate your skin beforehand, apply an even layer of tanning product, and use a tanning mitt for smooth application. Reapply as needed, and avoid prolonged sun exposure on specific areas.
What Should I Do if I Accidentally Get Sunburned?
Sunburns happen to the best of us. You should cool the skin with aloe vera, hydrate, and avoid sun exposure. If it blisters, keep it clean and consult a doctor for severe cases.
Can I Tan While Using Certain Medications?
Certain medications can increase your skin's sensitivity to UV rays, raising the risk of burns. Always consult your healthcare provider regarding tanning while on medication, and consider using sunless tanning options for safer results.
How Does Diet Affect My Tanning Results?
Your diet plays an essential role in tanning results. Consuming foods rich in antioxidants, vitamins A, C, and E can enhance skin health and promote an even, lasting tan while protecting against UV damage. Stay hydrated, too!
Are There Specific Products to Enhance My Tanning Results?
Yes, specific products like tanning lotions, oil, and bronzers can enhance your tanning results. Look for formulas with moisturizers and natural ingredients that promote an even tan, and always apply sunscreen to protect your skin.
Conclusion
As you prepare for your vacation, remember that achieving the perfect tan requires knowledge, care, and strategy.
Understand your skin type, choose the right tanning method, and plan your sessions wisely.
Prioritize safety, nourish your skin, and embrace the glow you create.
With the right approach—patience, diligence, and a bit of self-love—you'll not only shine on the beach but feel confident in your skin.
Step into your vacation radiating beauty and bask in the bliss you deserve!
Lifestyle
Unlock Your College Living With Furniture Rental
Unlock your college living with furniture rental—learn how to create a stylish space without the hassle of heavy lifting and endless commitments!
Releasing your college living with furniture rental is easy and stress-free. You can turn any space into a cozy home without the burden of buying and moving heavy items. With options from providers like CORT, you get access to stylish, move-in ready packages designed by professionals. Enjoy seamless delivery and setup, so your new furniture is ready when you are. Plus, flexible pickups and month-to-month leases fit your changing needs perfectly. It's all about customizing your living space while focusing on your studies and social life. Stick around to discover more tips and tricks for enhancing your college experience!
Key Takeaways
- CORT offers move-in ready packages that provide essential furnishings, allowing students to focus on their studies and social life.
- Seamless delivery and setup ensure your furniture is ready before you arrive, creating an immediate comfortable living environment.
- Flexible lease options, including month-to-month renewals and style switching, cater to changing needs throughout the college experience.
- Renting furniture promotes sustainability while offering a variety of styles, enabling personalized and updated living spaces annually.
Understanding Furniture Rental Options
When you're diving into college life, understanding your furniture rental options can make settling in a breeze.
CORT has been providing furniture rental services for nearly 50 years, making it the largest provider in the U.S. With 156 showrooms, you can easily find what you need.
The process is straightforward: just enter your ZIP code and rental duration on their website. For students, there's a Move-In Ready package designed by professionals, ensuring you have everything essential.
Plus, the autopay option simplifies your monthly payments, so you won't have to worry about missed deadlines. This flexibility allows you to focus on your studies and social life while enjoying a well-furnished space tailored to your needs.
Seamless Delivery and Setup
CORT guarantees a seamless delivery and setup process, scheduling services to match your move-in date for a hassle-free changeover.
When you rent furniture, you won't have to worry about hauling heavy items or assembling complicated pieces. Their experienced delivery team takes care of everything, ensuring your new space is ready for you to enjoy right away.
You'll appreciate how they handle all the setup, allowing you to focus on settling in and starting your college journey.
Plus, if your plans change, CORT offers flexible pickup options when your lease ends. With month-to-month lease renewals and the ability to switch furniture styles, your living situation can always feel fresh and tailored to your needs.
Advantages of Choosing CORT
Choosing CORT for your furniture rental means enjoying flexibility, convenience, and a tailored experience that meets the unique needs of college living.
You'll appreciate how CORT simplifies furnishing your space, allowing you to focus on your studies and social life. Here are some key advantages:
- Style Variety: You can switch up your furniture each year, keeping your space fresh and aligned with your tastes.
- Sustainability: Renting supports eco-friendly practices by reducing waste and promoting reuse.
With CORT, you're not just renting furniture; you're creating a comfortable, personalized home that evolves with you.
Budgeting for Furniture Rental
Understanding how to budget for furniture rental can help you make informed decisions and maximize your college living experience. Start by evaluating your monthly income and expenses to determine what you can allocate for furniture rental. Consider the length of your lease; longer terms often offer better rates.
Item | Cost Estimate | Notes |
---|---|---|
Bedroom Set | $100/month | Includes bed, dresser |
Living Room Setup | $120/month | Sofa, coffee table |
Dining Arrangement | $80/month | Table and chairs |
Kitchen Essentials | $50/month | Utensils and cookware |
Miscellaneous Decor | $30/month | Lamps, rugs, etc. |
Accessing Support and Resources
When you need help with your furniture rental, tapping into available resources can make the process smoother and more enjoyable. CORT offers various support options to guarantee you have everything you need during your rental experience.
Here are some resources you can access:
- FAQ Section: Find answers to common questions about furniture rental and policies.
- Social Media: Stay updated and engage with the community for tips and assistance.
Conclusion
In the grand adventure of college life, embracing furniture rental is like discovering a hidden treasure chest. You'll enjoy the comfort of stylish furnishings without the burden of ownership.
With CORT, you're not just renting; you're curating a cozy sanctuary that reflects your unique vibe. As you navigate this exciting chapter, let the ease of professional setup and flexible leasing lighten your load.
This way, you can focus on what truly matters: making unforgettable memories and thriving in your studies.
Lifestyle
Transform Your Closet With Simple Tips
Find out how simple tips can transform your closet into an organized haven, making it easier to find everything you need!
You can transform your closet with a few easy tips. Start by decluttering, letting go of items you haven't worn in a year. Master the folding technique by using the KonMarie method to maximize space and visibility. Optimize shoe storage with low-lying shelves and over-the-door hangers. Utilize storage cubes for small items, labeling each for easy identification. Enhance your vertical space by adding extra rods and shelves, and use wall hooks to organize accessories. These strategies create an organized sanctuary that makes finding what you need a breeze. Stick around to discover even more ways to revamp your closet!
Key Takeaways
- Declutter by removing items not worn in the past year and donating wearable pieces to charity for a fresh start.
- Fold clothing using the KonMarie method for better visibility and organization, making it easier to find what you need.
- Optimize shoe storage by utilizing vertical space with over-the-door hangers and low-lying shelves to keep shoes accessible and tidy.
- Use labeled storage cubes to categorize small items and seasonal clothing, ensuring everything has a designated space for easy access.
Declutter Your Closet
Start by diving into your closet and sorting through every item to identify what you truly need and what can go.
Be honest with yourself; if you haven't worn something in the past year, it's probably time to let it go.
Separate damaged clothing to recycle and take wearable items to a charity or thrift shop.
Don't forget about those hidden gifts or impulse buys lurking in the back—out they go!
Dispose of unwanted shoes, hats, and sports equipment too.
By the end of this process, you'll have a clearer, more organized space that reflects your current style.
Master the Folding Technique
Mastering the folding technique can transform your closet by maximizing space and keeping your clothes neatly organized. By using the KonMarie method, you can fold items into thirds, allowing you to store them upright. This not only saves space but also makes it easier to see what you have.
Here's a quick reference table to help you remember the folding process:
Item Type | Folding Method | Storage Tip |
---|---|---|
Shirts | Fold into thirds | Store vertically |
Pants | Fold into thirds | Stack in a drawer |
Sweaters | Lay flat, fold arms | Use a dedicated shelf |
Implementing these techniques will keep your closet organized, making it a breeze to find what you need!
Optimize Shoe Storage
Now that you've organized your clothes using effective folding techniques, it's time to focus on optimizing your shoe storage for a tidy and functional closet.
Start by getting shoes off the floor; low-lying shoe shelves can save valuable space.
Consider using over-the-door shoe hangers to utilize vertical storage efficiently.
If you need a budget-friendly solution, repurpose wine boxes as creative shoe organizers.
Stacking shoe organizers vertically can also help maximize your space.
Finally, group your shoes by type or occasion, making it easier to find what you need.
Utilize Storage Cubes
Storage cubes are a fantastic way to maximize your closet space and keep items organized. These versatile organizers help you store everything neatly, making it easier to find what you need.
Here are some tips for utilizing storage cubes effectively:
- Stack small cubes to create vertical storage solutions.
- Use different sizes for various items, like bags, toiletries, and towels.
- Label each cube for quick identification and easy access.
- Designate specific cubes for seasonal items to keep them out of the way.
Enhance Vertical Space
How can you make the most of your closet's vertical space to create a more organized and efficient environment?
Start by installing extra rods and shelves. Adding a second rod beneath your existing one doubles your hanging space.
Next, utilize wall hooks to hang bags, scarves, or hats, freeing up shelf space and keeping essentials within reach.
Consider over-the-door organizers for shoes or accessories to maximize every inch.
Stackable containers on the top shelf can hold seasonal items or less-used belongings, keeping them out of the way.
Finally, group similar items together to make finding what you need easier.
Conclusion
As you step back and admire your newly organized closet, you'll see a world of difference: chaos transformed into clarity.
The clutter you once dreaded has given way to a serene space where your favorite items shine.
With each carefully folded shirt and neatly arranged pair of shoes, you've created a sanctuary that simplifies your mornings and elevates your mood.
Embrace this newfound order, and let your closet reflect the calm and creativity you bring to your life.
Lifestyle
Essentials to Ditch in Studio Living
Leave behind bulky furniture and discover the essential changes that can transform your studio living into a cozy, efficient space.
To maximize your studio living space, ditch oversized sectional sofas and entertainment centers that eat up valuable floor space. Swap them for small sofas or wall-mounted TVs to keep your area organized. Simplify your dining setup by opting for compact tables instead of bulky furniture. You also don't need excessive dinnerware; a minimalist set will do. Finally, tackle clutter by regularly evaluating your belongings and investing in multifunctional furniture. These changes can create a cozy and efficient living environment, and there's plenty more to discover on optimizing your studio space.
Key Takeaways
- Ditch oversized sectional sofas; opt for small sofas or loveseats to maximize floor space in studio apartments.
- Remove bulky entertainment centers; utilize wall-mounted TVs and low media storage for a streamlined look.
- Simplify dinnerware collections; a minimalist set of 4-6 pieces efficiently meets daily dining needs without clutter.
- Eliminate heavy dining furniture; choose compact or foldable tables to enhance functionality and save space.
Space-Hogging Sectional Sofas
If you often find your studio feeling cramped, it's time to reconsider that space-hogging sectional sofa. While they offer comfort, these bulky pieces consume valuable floor space and can make your room feel cluttered.
Instead, think about opting for a small sofa or a loveseat that provides adequate seating without overwhelming your area. You could also introduce sleek armchairs or floor pillows to create a cozy atmosphere with versatility.
Sleeper sofas are another great option, offering dual functionality for hosting overnight guests while maintaining space efficiency. By swapping out your sectional, you'll maximize your studio's layout and enhance its livability.
Embrace lighter, more functional furniture to transform your space into an inviting and comfortable haven.
Oversized Entertainment Centers
Oversized entertainment centers can quickly overwhelm a studio apartment, consuming precious floor space and cluttering your living area. Instead of struggling with bulky furniture, consider alternatives that enhance your space without sacrificing style or functionality.
Opt for wall-mounted TVs to free up floor space.
Use low bookcases or media credenzas for storage and display.
Choose sleek designs that maintain a modern aesthetic.
These options not only create a more open feel but also help you stay organized. By ditching oversized entertainment centers, you'll make your studio more functional and visually appealing, allowing you to enjoy your space fully.
Embrace smart solutions that meet your entertainment needs while keeping your living area spacious and inviting.
Excessive Dinnerware Collections
When living in a studio, you don't need excessive dinnerware collections that take up valuable space and add to clutter. Instead, stick to a minimalist approach. A small set of four to six pieces will suffice for daily use, allowing you to enjoy meals without the unnecessary mess. Consider using versatile glassware that can serve multiple functions, and don't hesitate to utilize heavy-duty paper plates for easy cleanup. Here's a quick overview of what you actually need:
Item | Quantity | Purpose |
---|---|---|
Dinner Plates | 4 | Daily meals |
Bowls | 4 | Cereal, salads, snacks |
Glasses | 4 | Water, beverages, wine |
Utensils | 4 sets | Eating and cooking |
Serving Dishes | 2 | Sharing meals |
Bulky Dining Furniture
Bulky dining furniture can overwhelm your studio space and hinder your ability to create a functional layout. Instead of a large dining table and chairs, consider more adaptable options that maximize your area while still accommodating your needs.
Here are some alternatives to bulky dining furniture:
- Compact tables that seat two to four people, perfect for everyday use.
- Rolling kitchen islands that can double as dining surfaces and provide extra storage.
Ineffective Clutter Management
Ineffective clutter management can quickly transform your studio into a chaotic space, making it hard to enjoy your living area. To maintain order, start by creating a master list of essential items before you move in.
Prioritize regularly used clothing, bedding, and kitchen appliances. Regularly assess your belongings and donate or discard anything you don't need.
Invest in functional furniture that doubles as storage to keep your space tidy. Use bins and baskets to categorize items, ensuring everything has its place.
Conclusion
By letting go of space-hogging furniture and unnecessary items, you can truly enjoy your studio's potential.
Imagine transforming your cramped living area into a cozy retreat by swapping that bulky sectional for a sleek loveseat and a multifunctional coffee table.
With smart storage solutions, like under-bed bins, you'll keep clutter at bay while creating a stylish, inviting atmosphere.
Embrace the freedom of minimalist living—your urban oasis awaits!
-
News2 months ago
Young Tennis Prodigy Emerges: Merri Kelly Hannity
-
Lifestyle2 months ago
Show Your Love: How to Appreciate Someone's Home Decor in 5 Easy Steps!
-
Vetted2 months ago
15 Best Home Decor Dupes That Look Expensive But Are Budget-Friendly
-
Lifestyle2 months ago
DIY Window Treatments: How to Install Home Decor Collection Blinds!
-
Lifestyle2 months ago
Ultimate Guide: How to Arrange Home Decor for a Stunning Look!
-
Vetted2 months ago
15 Stunning Rustic Modern Farmhouse Kitchens That Will Inspire Your Next Renovation
-
News2 months ago
Clooney's Op-Ed Secrets: Obama's Muted Support
-
News2 months ago
Krejcikova's Stunning Tennis Triumphs and Future Potential