
In order to create visually appealing rustic wood signs, gather pine boards, stain, paint, and necessary tools such as a miter saw and drill. Cut and arrange the boards, then add supporting strips. Make stencils for designs and apply them to the wood. Sand the surface smooth, stain evenly for a rich color, then distress for a unique look. Use fine tip brushes to trace and paint your words. Securely mount the sign for display using stud finders and levels for stability. Try out different hanging methods for a personalized touch. Mastering these steps will make your wood signs stand out and add charm to your home decor. Consider adding embellishments like decorative knobs or hooks for both functionality and style. For a weathered appearance, you can use a wood aging solution to give your sign an authentic rustic look. These home decor sign making tips will ensure that your creations are visually appealing and structurally sound for long-lasting enjoyment in your home. Experiment with different techniques to create a variety of unique and personalized wood signs that reflect your personal style and creativity.
Key Takeaways
- Choose quality pine boards and stain for a rich finish.
- Use stencils for intricate designs and precise painting.
- Distress wood for a unique, weathered look.
- Trace letters for accurate painting with acrylic paint.
- Securely mount with appropriate hardware for display.

IHDYPPEW 18 Pack Wood Signs, Unfinished Rectangle Wooden Plaque with Rope, Live Edge Wood Plaque for DIY, Burning Carving, Wedding, Restaurant, Home Decor (4 x 10 Inch)
【Authentic Basswood with Natural Bark】 Each hanging wood signs is crafted from natural Basswood, featuring natural tree bark…
As an affiliate, we earn on qualifying purchases.
As an affiliate, we earn on qualifying purchases.
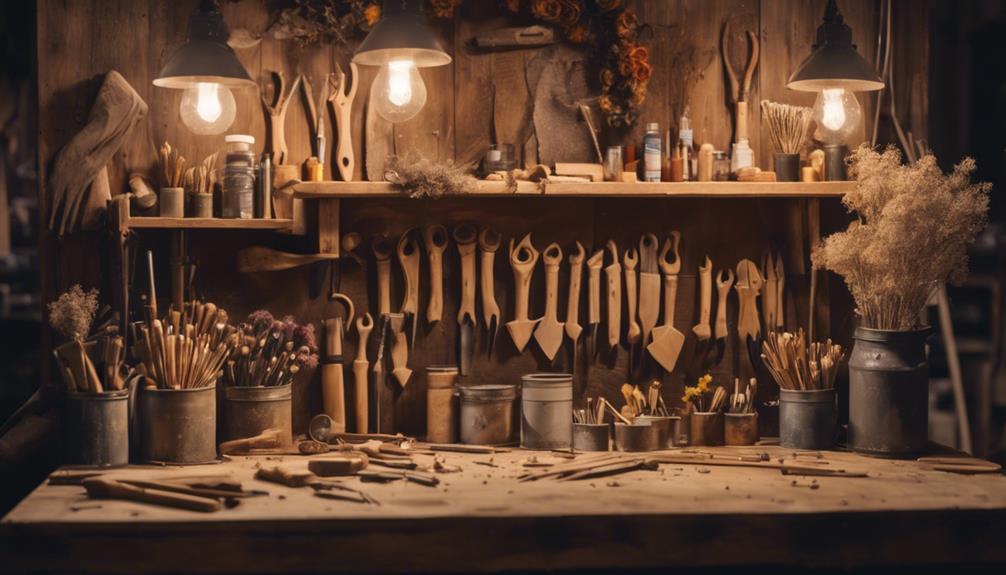
Materials and Tools
To create rustic wood signs, gather materials such as pine boards, wood strips, stain, vinyl, and paint. Head to the hardware store for these supplies. When selecting paint, opt for acrylics that work well on wood. You'll also need a fine tip paint brush for intricate designs.
Additionally, gather tools like a miter saw for precise cuts, a drill for assembly, clamps to hold pieces together, and various brushes for painting. When choosing wood, select pine boards that suit the size and style of your desired sign. Make sure the wood strips are complementary to the overall design.
Stain can add a beautiful finish to enhance the rustic look. With the right materials and tools in hand, you're ready to start crafting your own unique rustic wood sign.

PAIION Types of Wood Metal Sign Woodworking Knowledge Infographic Wall Poster for School Flower Shop Bar Cafe Home Kitchenes 8×12 Inch
Professional Knowledge and education posters can be gifts for children, biological lovers, adults, or decorated for your home,…
As an affiliate, we earn on qualifying purchases.
As an affiliate, we earn on qualifying purchases.
Building the Sign

Cut the pine boards into 24-inch lengths and the wood strips into 12-inch lengths to begin building your rustic wood sign.
Arrange the boards in the desired layout and clamp them together securely. Attach the wood strips across the back of the boards for added support.
Once the structure is stable, it's time to prepare the wood for stenciling.
Using a Silhouette or Cricut machine, create the stencils you want to use on your sign. Trace around the stencils onto contact paper or transfer tape, and carefully apply them to the wood surface.
Now, add a little paint to your stencil brush or sponge brush and start filling in the letters or designs.
After painting, let it dry thoroughly before moving on to the next steps. This process sets the foundation for the creative design you're going to add to your rustic wood sign.

Varathane Premium Fast Dry Wood Stain | 1 Hour Dry Time | 1 Coat Color | Interior Wood Stain | Furniture, Cabinets, Doors, Trim | Half Pint | Dark Walnut
Ideal for use on all interior wood projects: furniture, cabinets, doors, trim and paneling
As an affiliate, we earn on qualifying purchases.
As an affiliate, we earn on qualifying purchases.
Sanding and Staining
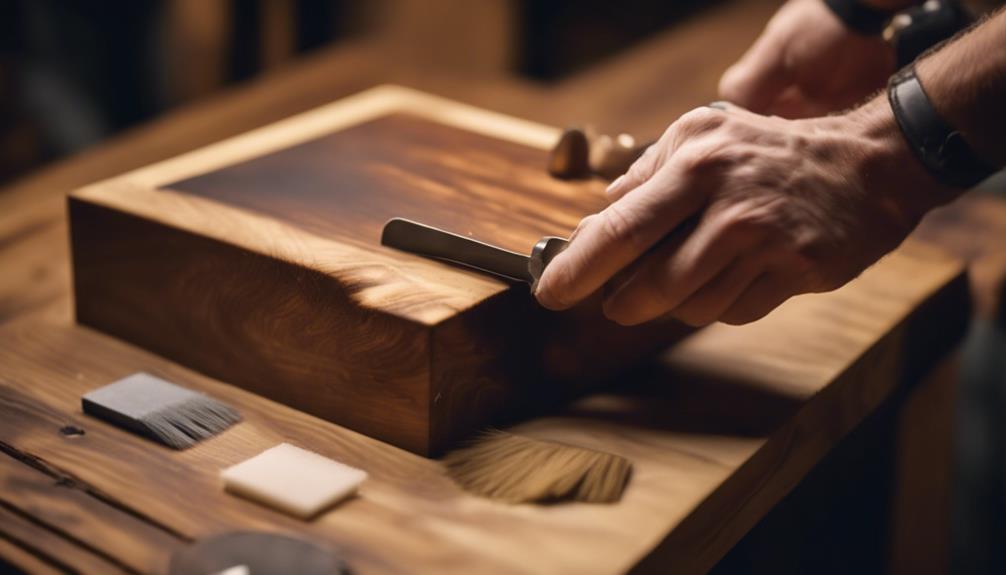
For achieving a smooth surface on your wood signs, consider using an orbital sander or sandpaper with 180 grit for necessary sanding. Sanding is a vital step in preparing the wood surface for staining. An orbital sander is an efficient tool that allows you to customize the level of smoothness based on your preference, ensuring a professional finish.
To enhance the rustic appearance of your wood signs, staining with Minwax Dark Walnut stain can provide a rich color and depth. Make sure to apply the stain evenly on both the front and back of the sign for a consistent look.
To add character and texture for a rustic appearance, consider distressing the wood before sanding. This technique can give your wood sign a unique and weathered look.
Proper sanding and staining techniques are necessary for preparing the wood surface before adding any words or designs, ensuring a polished final product that stands out in your home decor.

WOODOUNAI 10 Pcs Unfinished Wooden Hello & Welcome Sign Wooden Cutout Letter Hello Welcome Sign for Wreath DIY Art Blank Decorative Word Signs for Door Wall Christmas Trees Home Decor (Wood)
【Packaging Includes】:You will receive a set of WOODOUNAI unfinished wooden hello & welcome sign ,each with hemp rope….
As an affiliate, we earn on qualifying purchases.
As an affiliate, we earn on qualifying purchases.
Adding Words and Design
Consider using a ballpoint pen to trace around each letter for precise placement on your wood sign when adding words and design. To make a sign that stands out as a piece of home decor, follow these steps:
- Transfer the Design: Create grooves with the pen to transfer the design onto the wood, making it easier to paint inside the lines.
- Painting: Fill in the grooves with acrylic paint using a fine tip brush. Apply two coats of paint inside the letters for a solid coverage and vibrant look.
- Finishing Touch: Allow the paint to dry for 24 hours to make certain it sets properly before proceeding with the next steps. Once dry, secure the painted board with screws to each board for a sturdy finish.
Hanging and Displaying
When hanging and displaying your rustic wood sign, make sure it's securely mounted to the wall using the appropriate hardware for stability. Use a stud finder to locate studs in the wall, ensuring a secure attachment. To maintain a level position, employ a level tool while hanging the sign. Consider utilizing D-ring hangers or sawtooth hangers for easy installation and added stability. For an added touch of style, decorative hooks or brackets can enhance the overall display of your wood sign.
Experiment with various hanging methods like wire or twine to create a unique and personalized look for your rustic wood sign. By incorporating these methods, you can elevate the aesthetic appeal of your home decor.
Additionally, remember to clean your sign before displaying it by wiping off any excess dust or residue with a paper towel. With these tips in mind, your rustic wood sign will stand out beautifully in any space.
Frequently Asked Questions
How Do You Make Wooden Letters Look Rustic?
To make wooden letters look rustic, distress the wood, sand for a worn look, apply dark walnut stain, and use acrylic paint in grooves for a weathered effect. Opt for a fine tip brush for detailed finish. Experiment with distressing techniques for uniqueness.
How Do You Make a Wooden Sign Look Distressed?
To make a wooden sign look distressed, set free your inner artist! Grab tools like hammers and chains to create dents, then apply a dark stain or paint. Sand it off strategically for that perfectly weathered charm.
What Is the Best Wood for a House Sign?
For a house sign, consider cedar or redwood for outdoor durability, oak or pine for indoor balance, and maple or cherry for elegant grain. Reclaimed wood adds rustic charm. Choose based on location, weather, and style.
What Is the Best Wood for Wooden Signs?
For wooden signs, consider pine for affordability and ease, cedar for durability, oak for strength, birch plywood for versatility, and reclaimed wood for character. Each wood type offers unique benefits for creating standout home decor signs.
Conclusion
Now that you've mastered the art of making rustic signs, get ready to impress all your friends and family with your newfound skills!
Your home decor will never be the same once you start creating these beautiful and unique wood signs that stand out in any room.
So grab your materials and tools, let your creativity flow, and get ready to show off your amazing DIY creations!