Lifestyle
Eco-Friendly: How to Make Home Decor Using Plastic Bottles!
Discover creative ways to upcycle plastic bottles for eco-friendly home decor, from stylish vases to unique house projects!
You can make eco-friendly home decor using plastic bottles with these creative upcycling techniques. Transform bottles into a stylish vase or craft a unique house project. Get inspired by room decor ideas and vertical garden designs. Build an eco-friendly bird feeder to attract wildlife. Don't forget practical storage solutions by repurposing bottles for organization. Explore endless possibilities and make your home decor truly one-of-a-kind.
Key Takeaways
- Transform plastic bottles into decorative vases with chalk paint and wax.
- Design unique room decor and lighting using repurposed plastic bottles.
- Create structures and decorations using upcycled plastic bottles.
- Repurpose plastic bottles for eco-friendly bird feeders.
- Utilize plastic bottles for versatile storage solutions in home organization.
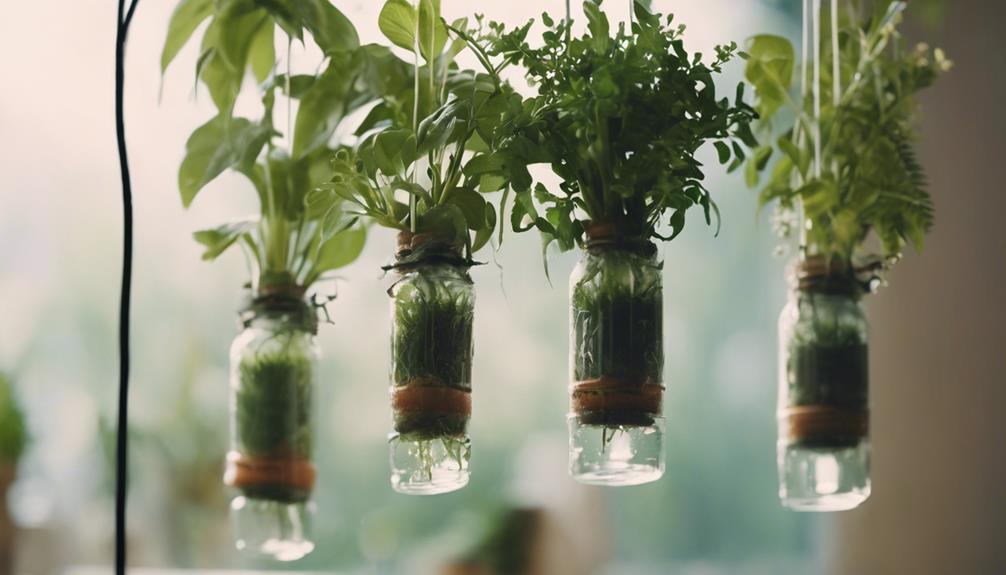
Upcycled Plastic Bottle Vase Tutorial
Transform an empty juice bottle into a chic vase by repurposing it with chalk paint and wax for a distressed finish. Immerse yourself in the world of recycled plastic with this DIY project. Start by thoroughly cleaning and drying the plastic bottle.
Apply a coat of chalk paint in your preferred color, ensuring even coverage. Once dry, lightly distress the surface with sandpaper for a vintage look. Seal the paint with wax to protect the finish and add depth.
For a seasonal twist, adorn your vase with a wood maple leaf ornament using twine. This simple addition adds a touch of charm and makes the vase perfect for fall decor.
Fill your upcycled plastic bottle vase with ornamental grass stems or pampas grass for a natural and elegant touch. Consider incorporating it into a budget-friendly Fall tray vignette for a cohesive and stylish home decor display.
Share your creativity with others to inspire and engage the community in sustainable and artistic endeavors.
DIY Plastic Bottle House Project
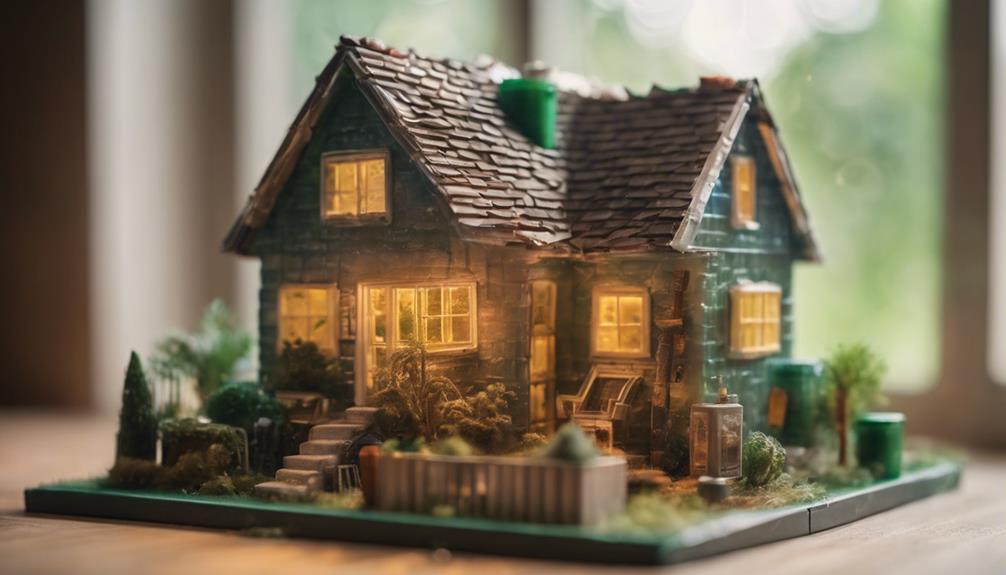
You can start building your own unique plastic bottle house by designing the structure with various bottle sizes and shapes.
Enhance the house's look by decorating it with craft foam details for doors, windows, and decorative elements.
Get creative with textures by using wood glue and sand for a realistic finish.
Designing Bottle House Structure
Designing your own bottle house structure for a DIY plastic bottle project involves creatively gluing together plastic bottles of various sizes and shapes to form a unique and sustainable home decor piece.
To start, assemble the plastic bottles using wood glue and reinforce their durability and appearance by adding layers of wood glue and paper towels to the surface.
For a realistic touch, incorporate craft foam doors, windows, and decorative elements using hot glue.
To enhance the texture and visual appeal of the house, sprinkle sand over the wood glue surface.
Complete the structure by crafting roofs from the tops of plastic bottles and detailing them with craft foam roof tiles.
Decorating With Craft Foam
To add intricate details and embellishments to your DIY plastic bottle house project, utilizing craft foam is a creative and versatile way to enhance the overall aesthetic. Craft foam can be used to create doors, windows, and decorative elements, adding a personalized touch to your project.
Additionally, incorporating craft foam borders can help conceal bottle bottoms and provide intricate detailing to your plastic bottle house. For a more realistic look, craft foam strips can be utilized to craft roof tiles, enhancing the overall appearance of the structure.
To enhance durability and appearance, consider applying a mixture of wood glue and paper towels to the surface of your plastic bottle house. This technique not only boosts the structural integrity but also adds texture and visual appeal.
Besides, spreading a mixture of wood glue and sand on the surface can further enhance the visual appeal and provide a unique tactile experience. By incorporating craft foam in various ways, you can elevate the design of your DIY plastic bottle house project.
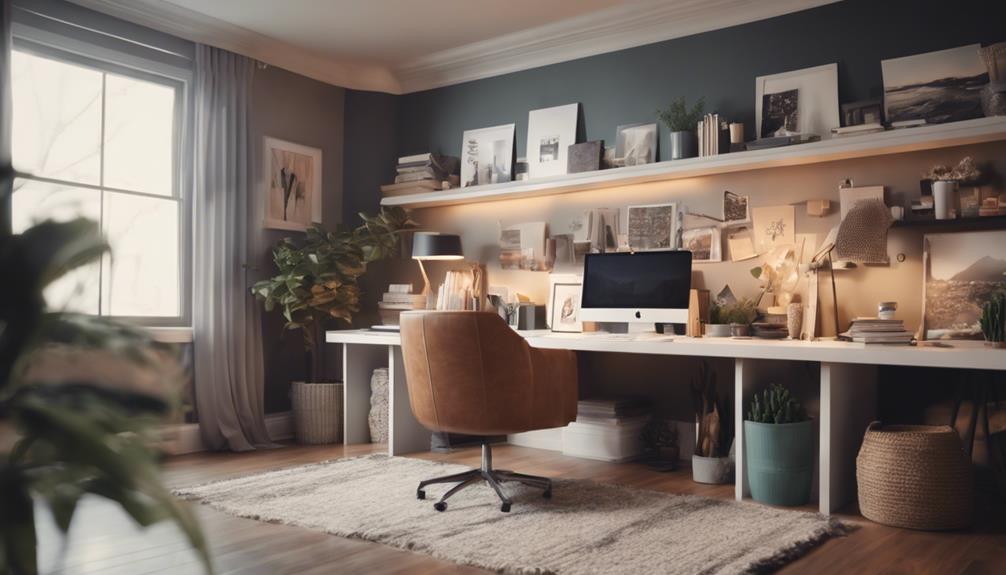
Creative Plastic Bottle Room Decor Ideas
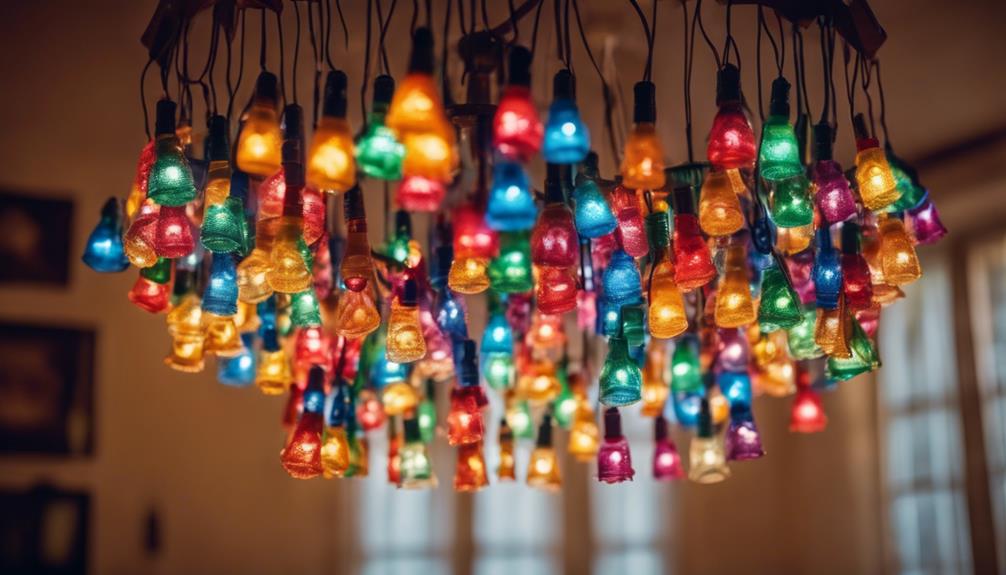
Transforming plastic bottles into unique flower lights is a creative and eco-friendly way to enhance room decor with a colorful and personalized touch.
You can also repurpose plastic bottles in various other imaginative ways to add flair and functionality to your living spaces:
- Create hanging lights by cutting bottles to make stylish lampshades and illuminate outdoor spaces with LED lights or candles.
- Repurpose bottles as storage solutions by cutting them horizontally to organize small items like nails or beads efficiently.
- Customize plastic bottles into plant pots by cutting them in half, drilling drainage holes, and reducing plastic waste in gardening.
- Experiment with creating terrariums in bottles to build mini ecosystems with layers of soil, rocks, and plants for observation and decoration.
These DIY projects not only help in reducing plastic waste but also allow you to express your creativity while decorating your home sustainably.
Plastic Bottle Vertical Garden Inspiration
Get inspired to create your own plastic bottle vertical garden and bring a touch of greenery to your living space. Upcycling plastic bottles into space-saving planters for a vertical garden is a fantastic way to add life to your walls or fences.
You can grow herbs, flowers, or even small vegetables in these innovative planters. Consider using drip irrigation for easy maintenance and efficient watering of your vertical garden.
Not only do these vertical gardens enhance both indoor and outdoor spaces with a splash of color and greenery, but they also serve as a sustainable and eco-friendly way to repurpose plastic bottles for home decor.
Embrace the creativity and environmental consciousness that comes with transforming simple plastic bottles into beautiful planters that can breathe new life into any area of your home. Engage in this upcycling project and watch your vertical garden flourish with life and vibrancy.
Eco-Friendly Plastic Bottle Bird Feeder DIY
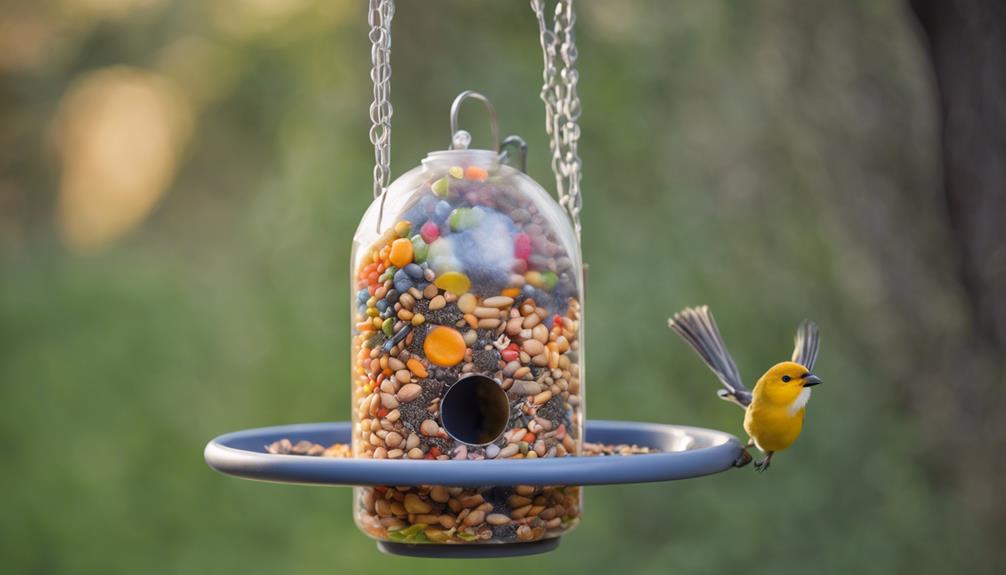
You can create a simple and effective feeding station by repurposing plastic bottles into bird feeders.
Consider different bird attractant options to cater to various species and encourage more visits.
Monitoring bird activity at your DIY feeder can offer insight into local wildlife behavior and provide an enjoyable learning experience.
Feeding Station Design
Create a sustainable bird feeding station by repurposing plastic bottles into an eco-friendly DIY bird feeder with recycled bottle cap perches. To design your feeding station effectively, follow these steps:
- Cutting Bottles: Use scissors or a sharp knife to carefully cut the plastic bottles into the desired shape for the feeder.
- Attaching Perches: Secure recycled bottle caps to the feeder using hot glue as perches for the birds to rest on while feeding.
- Adding Seeds or Nectar: Fill the feeder with bird seeds or nectar to attract a variety of bird species to your garden.
- Monitoring Bird Activity: Place the feeder in a visible spot and enjoy watching the birds from the comfort of your home.
- Promoting Biodiversity: By providing a sustainable food source, you can help support the local bird population and promote biodiversity in your area.
With these simple steps, you can upcycle plastic bottles into a functional and environmentally friendly bird feeding station that benefits both the birds and the environment.
Bird Attractant Options
Consider enhancing the appeal of your eco-friendly plastic bottle bird feeder DIY by incorporating a variety of bird attractant options such as different types of seeds or nectar. Using plastic bottles to create bird feeders is a sustainable way to attract birds to your garden while promoting biodiversity.
Different bird species are attracted to various types of seeds, so offering a mix can cater to a wider range of feathered visitors. Sunflower seeds, millet, and cracked corn are popular choices that appeal to many birds.
Additionally, providing nectar in specially designed feeders can attract hummingbirds and orioles to your outdoor space. By using recycled plastic bottles as feeders, you can easily refill them with fresh seeds or nectar to keep the birds coming back.
Experimenting with different attractants allows you to observe a diverse array of bird species, creating a vibrant and lively atmosphere in your backyard.
Monitoring Bird Activity
Enhance your birdwatching experience by setting up your eco-friendly plastic bottle bird feeder DIY and monitoring bird activity in your yard or garden. By monitoring bird activity, you can gain valuable insights into the avian visitors frequenting your feeder and contribute to their well-being.
Here are some tips to help you effectively monitor bird activity:
- Keep a bird journal to record the species and behaviors you observe daily.
- Use binoculars or a camera with a telephoto lens for a closer look at birds from a distance.
- Install a birdhouse nearby to attract nesting birds and expand your monitoring opportunities.
- Set up a water source like a birdbath to attract a wider variety of bird species to your yard.
- Create a feeding schedule to understand peak feeding times and the types of birds that visit at different hours.
Practical Plastic Bottle Storage Solutions
For efficient organization of small items like nails or beads, cut plastic bottles horizontally to create versatile storage containers.
By repurposing plastic bottles as storage solutions, you not only reduce waste but also promote sustainability.
Stack these cut bottles to efficiently organize your workspace, garage, or craft room.
Labeling the containers will make it easy to identify and access your stored items whenever needed.
Plastic bottle storage containers offer practical organization in various settings, such as garages, workshops, or craft rooms.
These DIY storage solutions using recyclables provide a cost-effective and eco-friendly way to keep your space tidy and clutter-free.
Whether you need a simple way to store screws and bolts in your workshop or beads and buttons in your craft room, plastic bottle storage containers offer a practical and versatile solution.
Start creating your own plastic bottle storage solutions today and enjoy the benefits of an organized space while contributing to environmental sustainability.
Frequently Asked Questions
How to Reuse Plastic Bottles for Decoration?
To reuse plastic bottles for decoration, cut, paint, and assemble them creatively. Transform bottles into vases, plant pots, or hanging lights. Add a personal touch to your space while promoting eco-friendly practices and reducing plastic waste.
How Do You Make an Eco Cooler Out of Plastic Bottles?
To make an eco cooler out of plastic bottles, stack them in a pattern, fill with wet sand. The water evaporation cools air inside. This DIY solution is cost-effective, energy-efficient, and sustainable. Stay cool and eco-friendly!
Are Plastic Bottles Eco Friendly?
Plastic bottles aren't inherently eco-friendly, but you can upcycle them into home decor items. Get creative by repurposing plastic bottles into functional pieces. By doing this, you contribute to sustainability efforts and inspire others to adopt eco-friendly practices.
How Can We Save the Environment by Using Plastic Bottles?
To save the environment using plastic bottles, transform them into DIY home decor. Repurpose bottles to reduce waste, conserve resources, and lower your carbon footprint. Get creative, inspire others, and promote sustainability through eco-friendly practices.
Conclusion
Now that you've learned how to create beautiful home decor using plastic bottles, the possibilities are endless!
From upcycled vases to DIY bird feeders, you can transform your space in a fun and eco-friendly way.
So go ahead, get crafty and let your imagination soar like a plastic bottle rocket!
Happy crafting!
Lifestyle
Mastering the Virtual Gift Exchange Experience
Navigate the art of virtual gift exchanges with essential tips that promise laughter and connection—discover how to elevate your next celebration!
To master the virtual gift exchange experience, start by picking a date that suits all participants. Set a budget for gifts to keep things comfortable and choose a reliable platform like Zoom or Google Meet. Clearly define the rules to avoid any confusion. During the exchange, maintain a fun atmosphere by encouraging laughter and excitement while revealing gifts. After the event, gather feedback to improve future exchanges and stay connected with everyone. By implementing these strategies, you'll create an enjoyable experience that everyone looks forward to, and there's even more you can learn about enhancing engagement and connection.
Key Takeaways
- Select a date and set a price limit that accommodates all participants to ensure everyone feels comfortable.
- Choose a user-friendly virtual platform and clearly define the rules for the gift exchange to avoid confusion.
- Create an engaging atmosphere by establishing a picking order and maintaining a running list of gifts and current owners.
- Utilize presentation tools for gift reveals to enhance visual engagement and maintain excitement throughout the event.
Preparing for the Event
To prepare for your virtual gift exchange, start by picking a date that works for all participants and setting a price limit for the gifts. This guarantees everyone is on the same page and comfortable with their spending.
Next, choose a virtual platform, like Zoom or Google Meet, that can accommodate your guest list. It's crucial to define clear rules for the exchange, such as whether participants can steal gifts or if there's a specific order for picking.
Conducting the Exchange
Once the preparations are complete, it's time to conduct the exchange and create an engaging experience for all participants.
Start by establishing a picking order; assign numbers so everyone knows when it's their turn to choose or steal a gift.
Keep a running list of each gift and its current owner to avoid confusion.
As gifts are revealed, encourage excitement and laughter—this is all about having fun!
Utilize presentation tools to showcase gifts visually, enhancing the atmosphere.
Don't forget to maintain a relaxed vibe; this will help everyone enjoy the moment.
Finally, be adaptable; if things don't go as planned, roll with it and keep spirits high.
The goal is to create lasting memories, even virtually!
Post-Event Activities
Reflect on the event by gathering feedback to improve future virtual gift exchanges. This step guarantees you understand what worked well and what could enhance, making each subsequent gathering more enjoyable.
Ask participants about their favorite moments.
Inquire if they found the tech easy to use.
Suggest areas where the flow could be smoother.
Explore interest in trying new themes or formats.
Collect ideas for different games or activities.
Gift Organization Strategies
Gathering feedback on your event can spark new ideas for how to organize gifts more effectively in future exchanges. Implementing a structured approach helps everyone stay engaged. Here are some strategies to contemplate:
Strategy | Description | Benefits |
---|---|---|
Purchase Gifts Online | Encourage guests to buy from sites like Amazon or Etsy. | Convenience and variety. |
Organize Showcase | Collect links and photos of gifts for display. | Visual excitement during the event. |
Use Presentation Tools | Utilize tools like PowerPoint for gift reveals. | Clear and engaging presentations. |
Facilitate Gift Reveals | Uncover gifts sequentially to maintain suspense. | Keeps participants intrigued. |
Effective Follow-Up Techniques
Following up after your virtual gift exchange is essential for maintaining connections and ensuring everyone feels appreciated. A thoughtful follow-up can strengthen relationships and leave a lasting positive impression.
Here are some effective techniques to reflect upon:
- Send Personalized Thank You Notes: Acknowledge each participant's effort in a heartfelt message.
- Share Event Highlights: Compile memorable moments or photos from the exchange to share with attendees.
- Gather Feedback: Ask for insights on what worked well and what could be improved for next time.
- Plan Future Events: Keep the momentum going by suggesting another gathering, whether virtual or in-person.
These actions help foster a sense of community and encourage future interactions.
Conclusion
As you gather online with loved ones, think of each gift as a glowing ornament on a virtual tree, shining brightly despite the distance.
This holiday season, the bonds you create through thoughtful exchanges will twinkle like lights, illuminating your shared moments and laughter.
Embrace the joy of giving, and remember that even miles apart, you can cultivate a festive spirit.
So, let your hearts connect, and make this virtual gift exchange a cherished memory.
Lifestyle
Transform Your Space: Home Staging Secrets
Find out how to effortlessly elevate your home's appeal with expert staging tips that will leave potential buyers wanting more…
Transforming your space through home staging is simpler than you think. Start by de-cluttering; less really is more. Create cozy conversation spots by arranging furniture thoughtfully, pulling pieces away from walls to enhance flow. Add modern accessories, like fresh flowers, to freshen up the look. If you have a historic home, highlight its unique features with a neutral backdrop and antique touches. For big changes, consider collaborating with professional stagers who bring creative insights. With the right strategies, you'll increase your home's appeal and selling potential. Stick around, and you'll uncover more helpful tips to elevate your home staging game.
Key Takeaways
- De-clutter rooms to maximize space and highlight your home's potential; remember, less is more.
- Create inviting conversation areas by arranging furniture thoughtfully and incorporating cozy accessories.
- Use neutral paint to provide a cohesive backdrop, enhancing the appeal of architectural features.
- Rent stylish furniture from CORT to stage your home affordably and attractively.
Importance of Home Staging
Home staging is vital because it creates a compelling first impression that can greatly influence potential buyers.
When you present a clean, de-cluttered, and de-personalized space, you allow buyers to envision themselves living there. Streamlined and modern aesthetics not only enhance your home's appeal but also highlight its best features.
Potential buyers often make quick judgments based on their initial experience, so it's essential to showcase your home in the best light. Staging helps create an inviting atmosphere that can set your property apart from the competition.
By investing time and effort into staging, you considerably increase your chances of selling your home quickly and at a better price.
Don't underestimate the impact of a well-staged home!
DIY Staging Techniques
Effective DIY staging techniques can transform any space, making it more inviting and appealing to potential buyers.
Start by de-cluttering your rooms; less is more when showcasing your home's potential.
Next, section large areas into distinct conversation spots to create a cozy atmosphere. Use appropriately sized rugs to anchor your furniture, adding definition to each zone.
Floating your furniture away from the walls can make the space feel more open and welcoming.
Don't forget to incorporate modern accessories like fresh flowers or stylish decor to inject a fresh look.
Enhancing Historic Homes
Enhancing historic homes involves showcasing their unique characteristics while balancing charm and modern appeal.
Start by highlighting architectural features like crown moldings, original hardwood floors, or intricate staircases. Use antique accessories, such as vintage books or period furniture, to add warmth and authenticity.
However, don't shy away from incorporating modern decor elements that improve functionality without overshadowing the home's character. Consider a fresh coat of paint in neutral tones to create a cohesive backdrop.
Verify spaces are de-cluttered to emphasize these historic features. Finally, arrange furniture to create inviting conversation areas, allowing potential buyers to envision themselves living in the space while appreciating its rich history.
This approach offers a perfect balance between the old and the new.
Collaboration With Professionals
Collaborating with professional stagers can elevate your home staging efforts and bring fresh perspectives to your space. These experts offer invaluable insights that can transform your home into a buyer's dream. They understand current trends and know how to highlight your home's best features, ensuring it stands out in the market.
By working together, you can incorporate their creative ideas while still reflecting your personal style. Utilizing resources like social media, you can share ideas and learn from their experiences. This collaboration encourages community engagement and helps you discover innovative solutions for your staging challenges.
Don't hesitate to reach out to professionals—they can provide the guidance you need to make a lasting impression on potential buyers.
Resources and Support
CORT provides valuable resources and support to help you navigate the home staging process effortlessly.
You can take advantage of their rental furniture options, allowing you to create a stylish and inviting space without a hefty investment.
Their blog is packed with ongoing tips on furniture selection and staging techniques that can elevate your home's appeal.
Plus, you're encouraged to share your staging experiences, fostering a community of support and inspiration.
If you have questions, CORT offers an extensive FAQ section to address common inquiries, ensuring you never feel lost.
For additional assistance, easy contact options are available, putting expert advice at your fingertips when you need it most.
Transform your space confidently with CORT's expert resources!
Conclusion
By embracing the art of home staging, you're not just sprucing up your space; you're crafting an inviting atmosphere that whispers 'welcome' to potential buyers.
With a little creativity and effort, your home can shine like a star in the crowded real estate galaxy.
Remember, even the coziest nooks can become enticing retreats with the right touch.
So, go ahead and transform your space—after all, you're merely inviting others to fall in love with what you've cherished.
Lifestyle
Transform Your Carpet With Rug Layering
Navigate the world of rug layering to elevate your carpet style, and uncover secrets that will redefine your space in unexpected ways!
Layering rugs over your carpet can completely transform your space by adding depth, personality, and visual interest. It's a great way to showcase your style and make your rooms feel more inviting. Start by choosing area rugs that complement your carpet's colors and patterns. Mixing different shapes, like round or abstract designs, can create unique focal points. Plus, you can personalize your space by selecting colors and textures that resonate with you. Experimenting with placement also alters how you perceive the room. Want to discover more tips for enhancing your decor? There's plenty more to explore!
Key Takeaways
- Choose area rugs that complement your existing carpet's colors and patterns for a harmonious look.
- Layering rugs adds depth and texture, transforming your carpet into a visually interesting focal point.
- Experiment with different shapes like round or abstract rugs to create unique arrangements and cozy vibes.
- Incorporate contrasting elements through patterns and textures to enhance the overall aesthetic of your space.
Benefits of Layering Rugs
Layering rugs not only adds depth and texture to your space but also allows you to showcase your personal style in a unique way.
You can mix and match different patterns and colors to create an eclectic look that truly reflects your personality. This approach is perfect for young professionals and students who want to express their trendy tastes.
By combining various textiles, you release your creativity, turning a simple floor into a statement piece. Layering rugs also enhances visual interest, making even the most mundane rooms feel inviting and dynamic.
Exploring Different Shapes
Exploring various rug shapes can dramatically change the vibe of your space, drawing attention away from any design flaws while adding a fresh element to your decor. Here are four shapes to reflect on for your next layering project:
- Rectangular: Perfect for large areas, they create a grounded feel and can conceal imperfections.
- Round: These add softness and warmth, making them ideal for cozy seating arrangements.
- Square: Great for defined spaces, they can establish zones within open layouts.
- Abstract: Unique shapes can serve as statement pieces, enhancing your decor's personality.
Enhancing Your Current Carpet
Enhancing your current carpet can elevate your space, making it more inviting and stylish without the need for a complete overhaul.
Start by choosing area rugs that complement your existing carpet's colors and patterns. Layering a chic area rug over your carpet can create a focal point and add texture.
You can also play with contrasting elements to introduce visual interest, drawing attention to your favorite features. Consider the size and shape of the rugs to guarantee they fit well within your room's layout.
This approach not only maximizes your current decor but also transforms your area into a unique reflection of your style, creating a harmonious and sophisticated atmosphere.
Personalizing Your Space
Personalizing your space lets you express your unique style and preferences, making your home truly feel like yours. Layering rugs is a great way to add character and warmth while showcasing your individuality.
Here are some tips to help you personalize your area:
- Choose colors that resonate with your personality—bold tones for energy or soft hues for tranquility.
- Mix patterns and textures to create a dynamic look that tells your design story.
- Incorporate sentimental items like a vintage rug or a family heirloom to evoke memories and feelings.
- Experiment with placement; a layered rug arrangement can transform how you perceive the space.
With these strategies, you can make your home an authentic reflection of who you are.
Monochrome Design Techniques
Using a monochrome palette can dramatically elevate your interior design by creating a cohesive and sophisticated look throughout your space. By selecting one color and varying its shades and textures, you can add depth and visual interest without overwhelming your design. This approach simplifies your choices in furniture and decor, allowing you to focus on complementary elements that enhance your theme.
Layering rugs in different textures—like a plush cream rug over a flat weave—can add dimension while maintaining a unified appearance. You'll find that using patterns within the same color family can further enrich the space.
Experimenting with accessories in your chosen hue invites creativity, making monochrome design both striking and personal. Embrace this technique to transform your rooms effortlessly!
Conclusion
So, go ahead and release your inner interior designer!
Layering rugs isn't just a decorating choice; it's an art form that says, “I can't commit to just one style!”
With a little creativity and a sprinkle of confidence, you'll turn your carpet into a runway for your wildest design dreams.
Who knew hiding those pesky stains could be so chic?
Embrace the chaos, and let your floor fashion speak volumes—because sometimes, more really is more!
-
News2 months ago
Young Tennis Prodigy Emerges: Merri Kelly Hannity
-
Lifestyle2 months ago
Show Your Love: How to Appreciate Someone's Home Decor in 5 Easy Steps!
-
Vetted2 months ago
15 Best Home Decor Dupes That Look Expensive But Are Budget-Friendly
-
Lifestyle2 months ago
DIY Window Treatments: How to Install Home Decor Collection Blinds!
-
Lifestyle2 months ago
Ultimate Guide: How to Arrange Home Decor for a Stunning Look!
-
Vetted2 months ago
15 Stunning Rustic Modern Farmhouse Kitchens That Will Inspire Your Next Renovation
-
News2 months ago
Clooney's Op-Ed Secrets: Obama's Muted Support
-
News2 months ago
Krejcikova's Stunning Tennis Triumphs and Future Potential